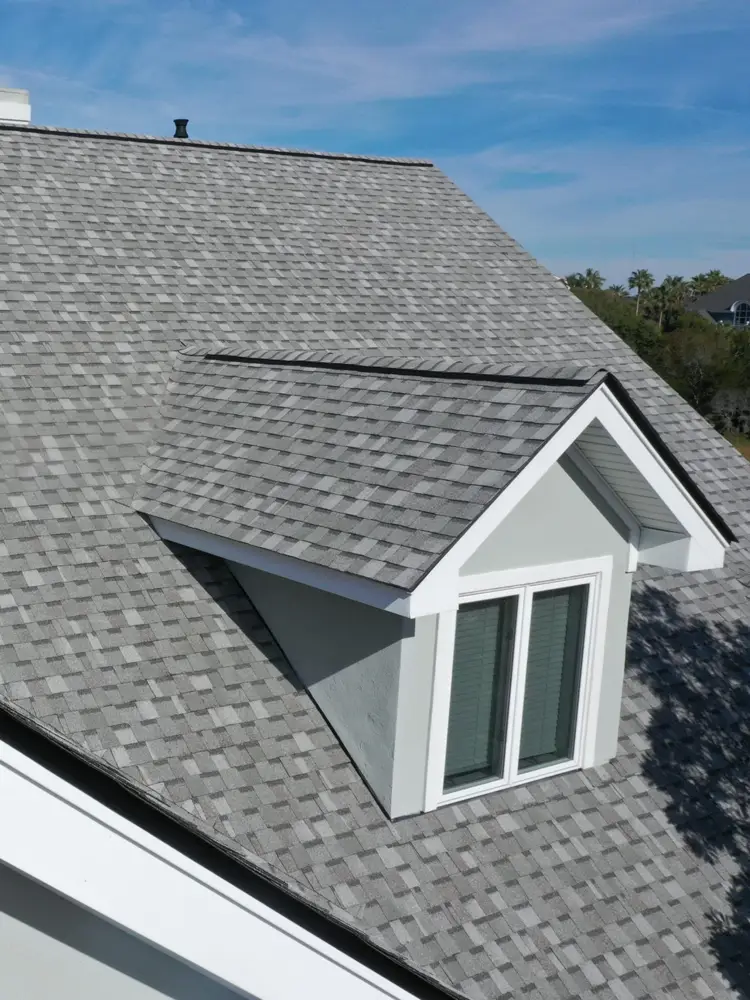
Cracked Lead Flashing: Fix Roof Leaks Before They Spread
Cracked lead flashing can let water into roof joints around chimneys, valleys, skylights, and walls. For San Antonio homeowners dealing with a new ceiling stain, damp chimney area, or leak after a storm, the immediate priority is to stop water from reaching the roof deck, insulation, and framing. Partnering with certified San Antonio roofing professionals helps identify active leaks early, protect your property value, and determine whether City of San Antonio / Bexar County permit rules or Texas insurance documentation apply.
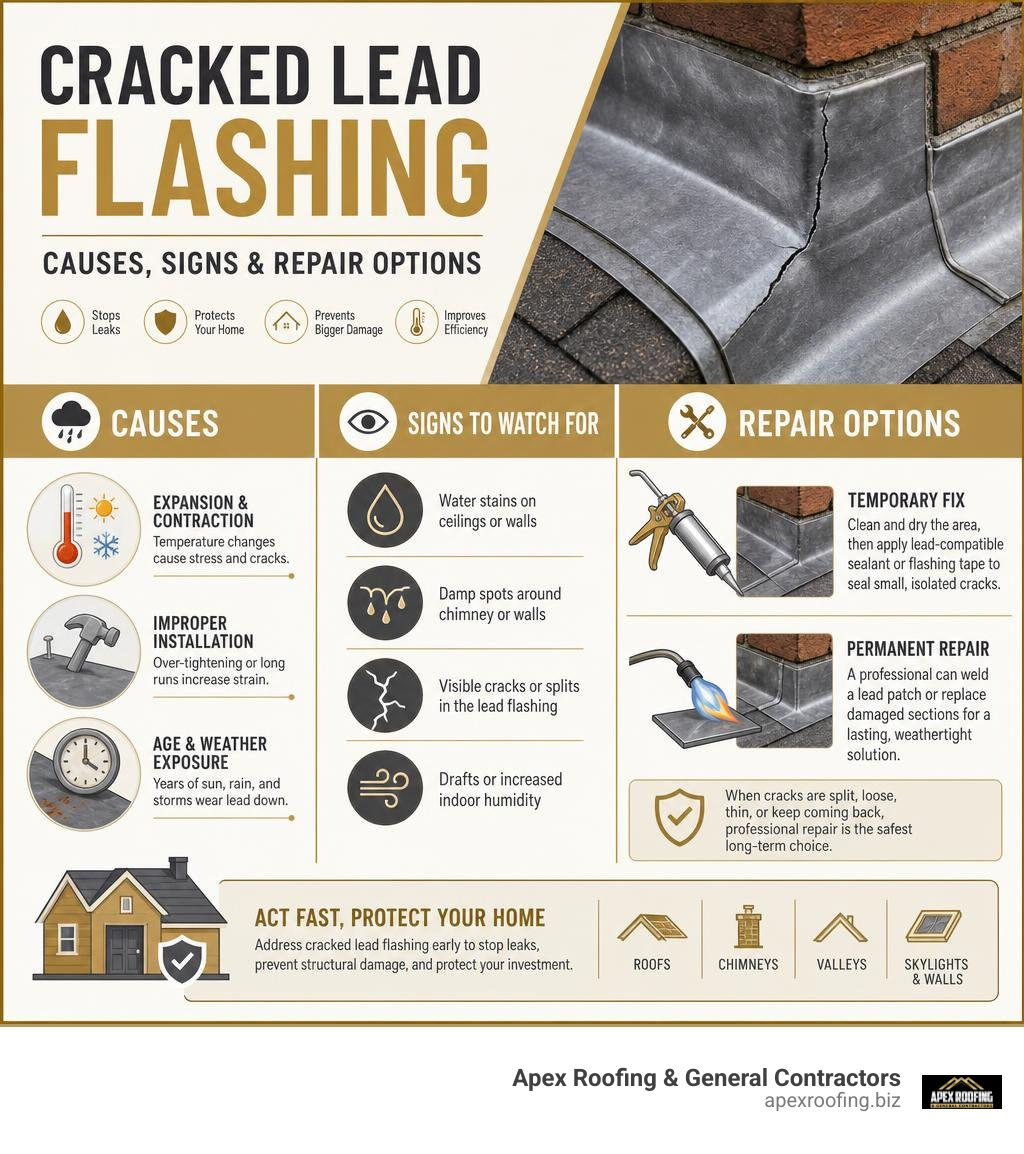
Quick answer: A small, isolated crack can sometimes be stabilized temporarily with a lead-compatible sealant or flashing tape after the surface is cleaned and dried. A lasting repair usually requires a professional roof inspection, a welded lead patch, or replacement of the damaged flashing section, especially when the lead is split, loose, thin, or repeatedly leaking.
Lead expands in heat and contracts as temperatures fall. Over years, intense San Antonio heat and UV load, spring hail season, and high wind events create continuous thermal cycling and mechanical stress. Ground shifts from expansive clay soils can also move house framing slightly, placing extra stress on flashing joints.
Carlos Yzaguirre is President and Managing Partner of Apex Roofing & General Contractors, serving property owners across San Antonio and nearby communities with roof repair and storm-damage solutions. His team helps homeowners assess cracked lead flashing, trace active leaks, and choose clear repair options before water damage grows.
Related roof leak resources:
What Causes Cracked Lead Flashing and Why It Fails
Roof flashing sits at high-risk structural transitions: around chimney bases, inside roof valleys, along side-wall abutments, and bordering dormers. Sheet lead can last for decades when it is correctly sized, detailed, and allowed to move, but South Texas heat, storm exposure, and building movement can shorten its service life.
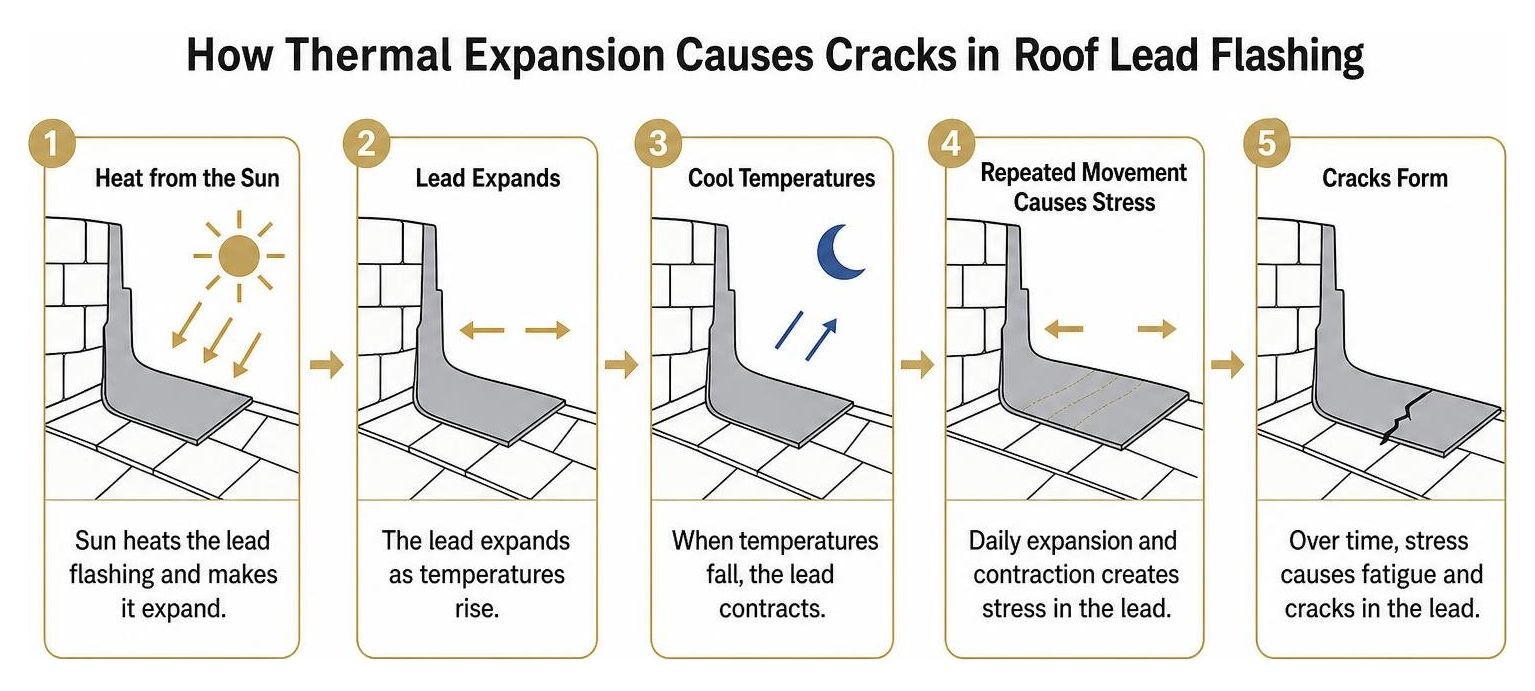
The primary mechanical driver behind cracked lead flashing is continuous thermal movement. Lead has a high rate of expansion compared with many building materials. In the San Antonio region, intense solar heat and high UV load can push roof surfaces well above the surrounding air temperature before they cool overnight, causing the metal to expand and contract repeatedly. Structural shifts from local expansive clay soils can add movement at wall abutments, while high wind events and spring hail season can place sudden impact and pressure on metal runs.
Other structural factors accelerate this failure:
- Overly long sheet runs: Long, uninterrupted lead sections restrict room for thermal movement. Without expansion steps or proper laps, internal stress can force the sheet to buckle, crease, and crack.
- Wrong thickness for the detail: Thin or underspecified lead is more vulnerable to tearing, oxidation, and premature splitting than heavier flashing suited to the roof condition.
- Restricted fixings and structural movement: Over-nailing, rigid mortar embedment, or tight fastening can prevent natural sliding during temperature shifts, creating high-stress tear points around fastenings.
- Physical impact and storm damage: Hail, falling branches, or heavy foot traffic during roof work can create dents or stress fractures that expand under weather exposure.
Early Warning Signs of Failing Lead Flashing
Catching flashing failure early protects underlying timber decking, ceiling drywall, and wall cavity framing from serious moisture intrusion. Homeowners should watch for these signs:
- Visible surface hairline splits: Thin fractures along bends, corners, or center lines of step and valley flashings.
- Powdery white oxide residue: Heavy oxidation can leave a dull, chalky white powder or streak across the lead surface, signaling advanced weathering.
- Crumbled or missing mortar joints: Failed mortar at masonry chase joints can allow water to track behind wall sections.
- Interior water stains and wall dampness: Brown rings on drywall, bubbling paint, or damp patches around chimney areas and ceiling slopes after rainstorms. To understand how water travels behind shingles, review our guide on why roofs leak.
- Unexplained energy bill changes: Open gaps at roof joints can disrupt the building envelope, letting conditioned air escape through attic spaces.
Key Tools and Materials Professionals Use
When technicians evaluate a damaged lead joint, specialized materials and equipment may be needed for a durable restoration:
- Surface cleaning gear: Wire brushes, mineral spirits, and clean rags to remove dirt, oxidation, and loose mortar.
- Lead-compatible sealants and primers: Flexible sealants designed for metal flashing and exterior roof exposure.
- Mechanical clips and fixings: Stainless steel or lead-compatible clips that secure edges into masonry chase joints while allowing normal movement.
- Temporary patching strips: Self-adhesive metal-backed flashing tapes used only for short-term emergency stabilization.
- Thermal equipment: Industrial hot-air equipment or welding torches operated by trained lead repair professionals.
- Personal protective equipment: Heavy-duty gloves, eye protection, fall-protection equipment, and respirators when lead dust or solvents are present.
What a Professional Cracked Lead Flashing Repair Assessment Includes
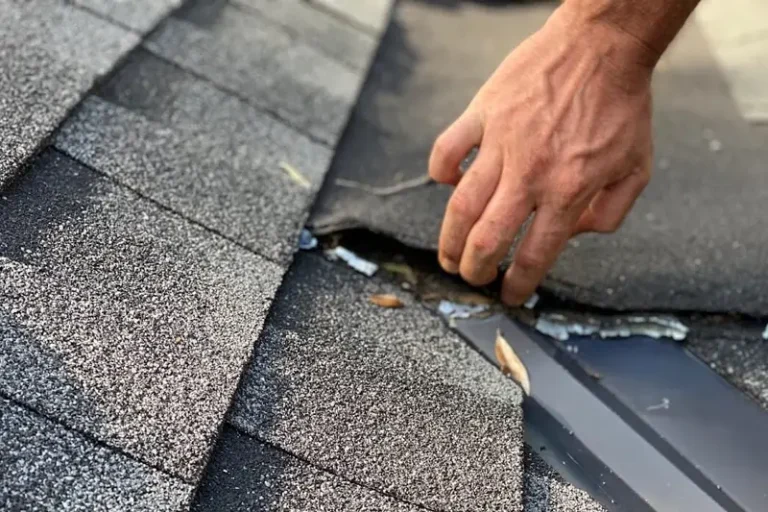
Addressing compromised roof metal requires a structured professional assessment rather than a homeowner repair tutorial. A certified roofing contractor evaluates how the flashing failed, whether water has already reached the roof deck or framing, and whether the safest solution is emergency stabilization, lead welding, repointing, or full section replacement. This approach helps protect the home while supporting local permit compliance and recognized jobsite safety expectations, including OSHA ladder safety requirements under 29 CFR 1926.1053.
Surface Condition and Joint Access
A professional inspection starts with the condition of the exposed flashing and the surrounding roof transition. Contractors look for dirt buildup, oxidation, loose mortar, lifted edges, hail impact marks, and open chase joints that allow wind-driven rain to travel behind the metal. The goal is to determine whether the visible crack is an isolated defect or a symptom of broader movement, poor anchoring, or aged material.
Moisture, Decking, and Framing Review
Cracked lead flashing often leaks before the damage becomes visible indoors. Roofing specialists check the adjacent underlayment, decking, rafters, chimney framing, attic surfaces, and ceiling areas for moisture staining, soft wood, mold-prone dampness, or hidden rot. If wet structural material is present, the repair plan must address that damage before the roof covering is closed back up.
Repair Method Selection
The right repair depends on the age, thickness, location, and movement pattern of the lead. A contractor may recommend short-term storm stabilization when active rain is entering the home, but temporary sealants and flashing tapes are not permanent roof system repairs. Long-term options may include a welded lead patch, replacement of a failed flashing section, renewed masonry joint sealing, or a more complete rebuild of the flashing detail when the original installation restricted thermal movement.
Chase Joint, Mortar, and Fastening Evaluation
Where lead flashing enters masonry, the chase joint must hold the flashing securely while still allowing normal expansion and contraction. Contractors evaluate whether mortar has crumbled, whether clips or wedges are missing, and whether rigid fastening has created stress points. This review is especially important around chimneys and wall abutments exposed to San Antonio heat, high wind events, and spring hail season.
Water Management and Final Verification
Before a flashing repair is considered complete, the surrounding roof drainage must be checked as a system. Valleys, gutters, downspouts, roof-to-wall transitions, and nearby shingles all affect how water moves across the repaired area. Professional verification can include controlled water testing, attic moisture checks, and confirmation that runoff flows away from vulnerable joints rather than pooling against the lead.
Temporary Fixes vs. Permanent Repairs for Cracked Lead Flashing

When managing cracked lead flashing, property owners need to understand the difference between emergency stabilization and lasting structural repair. Emergency sealants can reduce water entry for a limited time, but they do not solve the movement, fastening, or material failure that caused the crack.
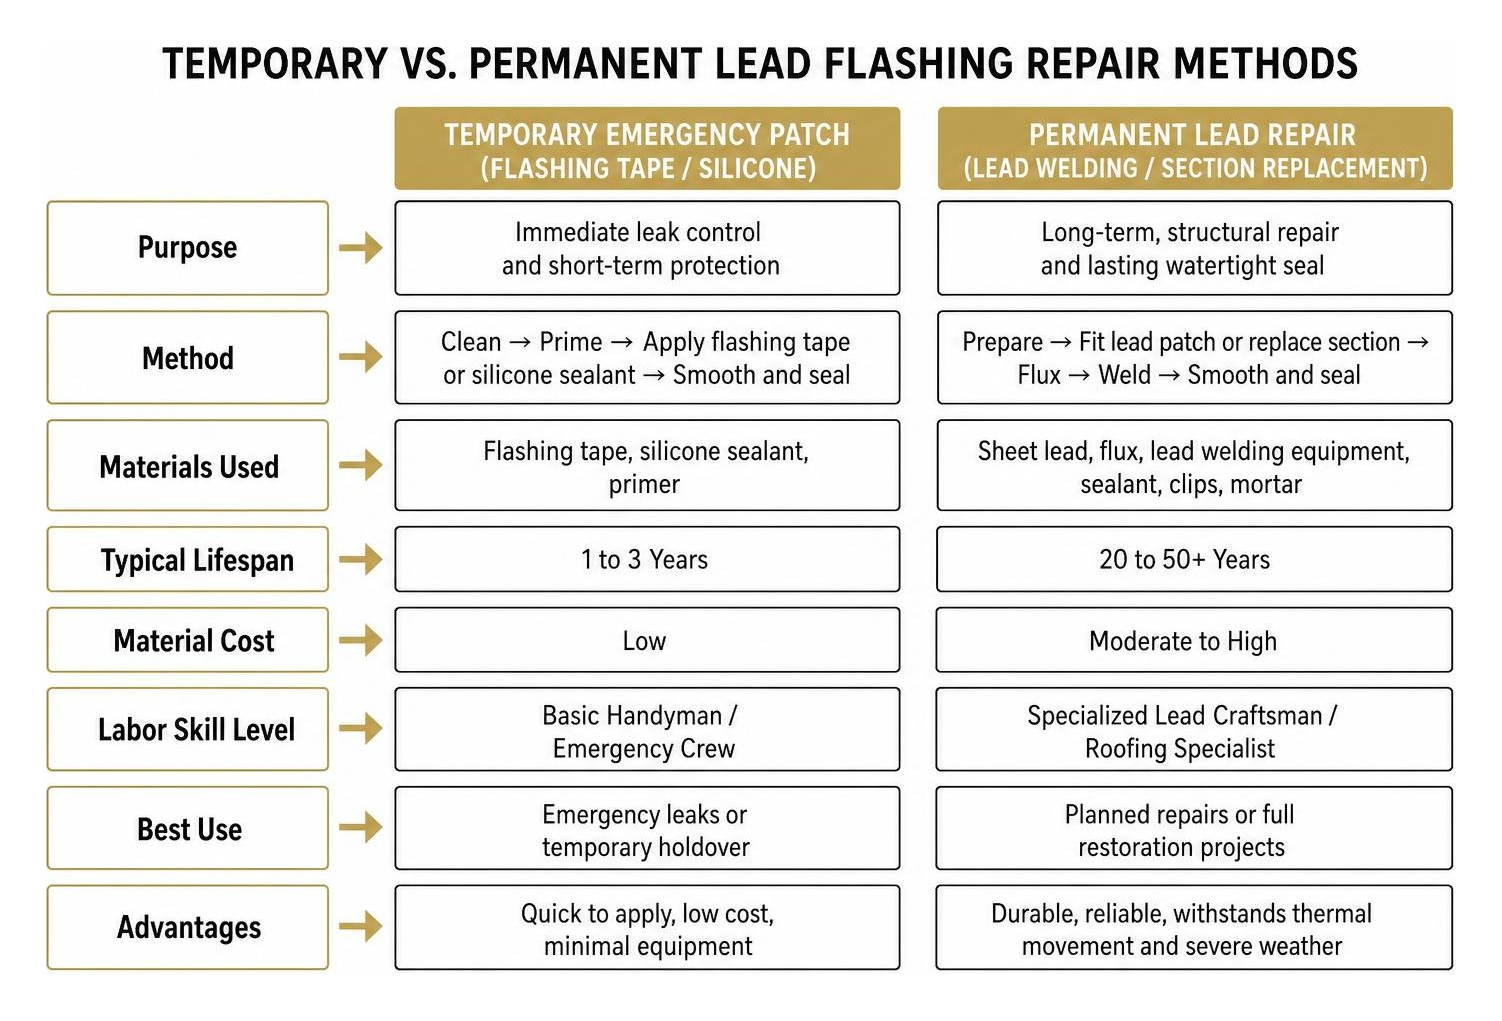
| Feature / Metric | Temporary Emergency Patch | Permanent Lead Repair |
|---|---|---|
| Primary purpose | Short-term leak control during active weather or until inspection | Long-term restoration of the flashing detail |
| Typical approach | Lead-compatible sealant or flashing tape over a cleaned, dry surface | Lead welding, section replacement, repointing, or rebuilt flashing detail |
| Skill level | Emergency roof crew or qualified repair technician | Roofing specialist or trained lead repair professional |
| Thermal movement handling | Limited; surface patches can lift as metal moves | Stronger; repair is designed around movement and drainage |
| Best used for | Immediate storm stabilization | Durable leak elimination and home protection |
Temporary emergency options, such as self-adhesive flashing tapes or compatible exterior sealants, can help stop active leaks during severe rainstorms. In San Antonio heat, however, surface patches are exposed to intense UV, roof-surface temperature swings, and repeated lead movement. They should be treated as a temporary measure until a professional can inspect the flashing and surrounding roof transition.
Permanent lead repair restores the failed detail rather than covering it. Depending on the condition of the roof, the contractor may weld a lead patch, replace the damaged section, repoint a masonry chase joint, secure loose edges, or rebuild the transition so the flashing can expand, contract, and shed water correctly.
When to Replace Instead of Repairing Cracked Lead Flashing
While localized spot repairs can extend roof life, certain damage conditions make complete replacement the better long-term choice:
- Extensive age-related fatigue: Network cracking across the sheet can mean the lead has thinned and reached the end of its functional life.
- Repair cost approaching replacement value: If localized repair would cost a large share of full replacement, new flashing can provide better long-term value.
- Incorrect thickness or poor detailing throughout: If the original roof detail used thin metal, rigid fastening, or poor laps, patching individual splits can leave the same failure pattern in place.
- Severe sub-structure timber rot: When decking, fascia, or framing below the valley or chimney has rotted from hidden leaks, flashing must be removed so the structure can be repaired before the roof is closed again.
Risks of Ignoring Flashing Damage
Delaying repairs on compromised roof flashing can create cascading damage throughout a structure. What begins as a minor hairline fracture across a lead fold can evolve into expensive structural repair work.
- Structural timber decay: Water through split flashing can saturate roof rafters, purlins, and plywood decking. Prolonged moisture exposure supports wood-decay fungi and can weaken load-bearing timber.
- Mold-prone dampness: Trapped attic moisture creates conditions where mold can grow inside insulation and wall cavities, reducing indoor air quality and often requiring professional remediation.
- Internal drywall and masonry damage: Water running down chimney areas can destabilize interior plaster, ruin ceiling paint, and damage mortar inside wall cavities.
- Attic insulation damage: Blown-in fiberglass or cellulose insulation can absorb leaking water. Saturated insulation loses thermal performance and can contribute to ceiling staining or sagging.
- Insurance documentation problems: Texas homeowners insurance commonly focuses on sudden storm damage rather than long-term maintenance deterioration. After hail or wind damage, homeowners should document the damage, limit further water entry, and follow their insurer’s claim process before making permanent repairs.
To protect your home from extensive moisture damage, explore our comprehensive residential roof repair services.
Frequently Asked Questions About Roof Flashing Repair
How long does a temporary repair on cracked lead flashing last?
A temporary repair using self-adhesive flashing tape or compatible exterior sealant is a short-term stabilization measure, not a permanent repair. San Antonio’s intense summer heat, high UV exposure, and rapid temperature shifts can cause surface patches to lift or split as the lead moves. Temporary tape should only be used to reduce active water entry after high wind events or hail storms until a certified roofer can inspect the area and recommend a durable repair.
Can I repair cracked lead flashing myself or should I hire a pro?
Roof work involves significant safety hazards, including steep pitches, height exposure, and possible contact with lead oxidation dust. OSHA ladder rules for construction work address ladder use and safe access, and professional roofing crews also use fall-protection practices suited to the roof. Improper DIY fixes, such as rigid fillers or incompatible caulks, can restrict normal lead movement and cause wider splits during seasonal shifts. Hiring a qualified roofing contractor helps protect the home, document storm-related damage, and determine whether local permit requirements apply.
What is the cost difference between repairing and replacing lead flashing?
Minor spot repairs, such as localized lead welding or repointing a short masonry chase joint, usually cost less than replacing a full lead roof valley or re-flashing a complex chimney area. Final pricing depends on roof accessibility, pitch, scaffolding needs, labor complexity, material condition, structural repairs, and whether the damage is part of a documented Texas insurance claim after a covered storm event. A professional inspection gives homeowners the clearest repair-versus-replacement comparison.
Comprehensive Flashing Care Protects Your San Antonio Home
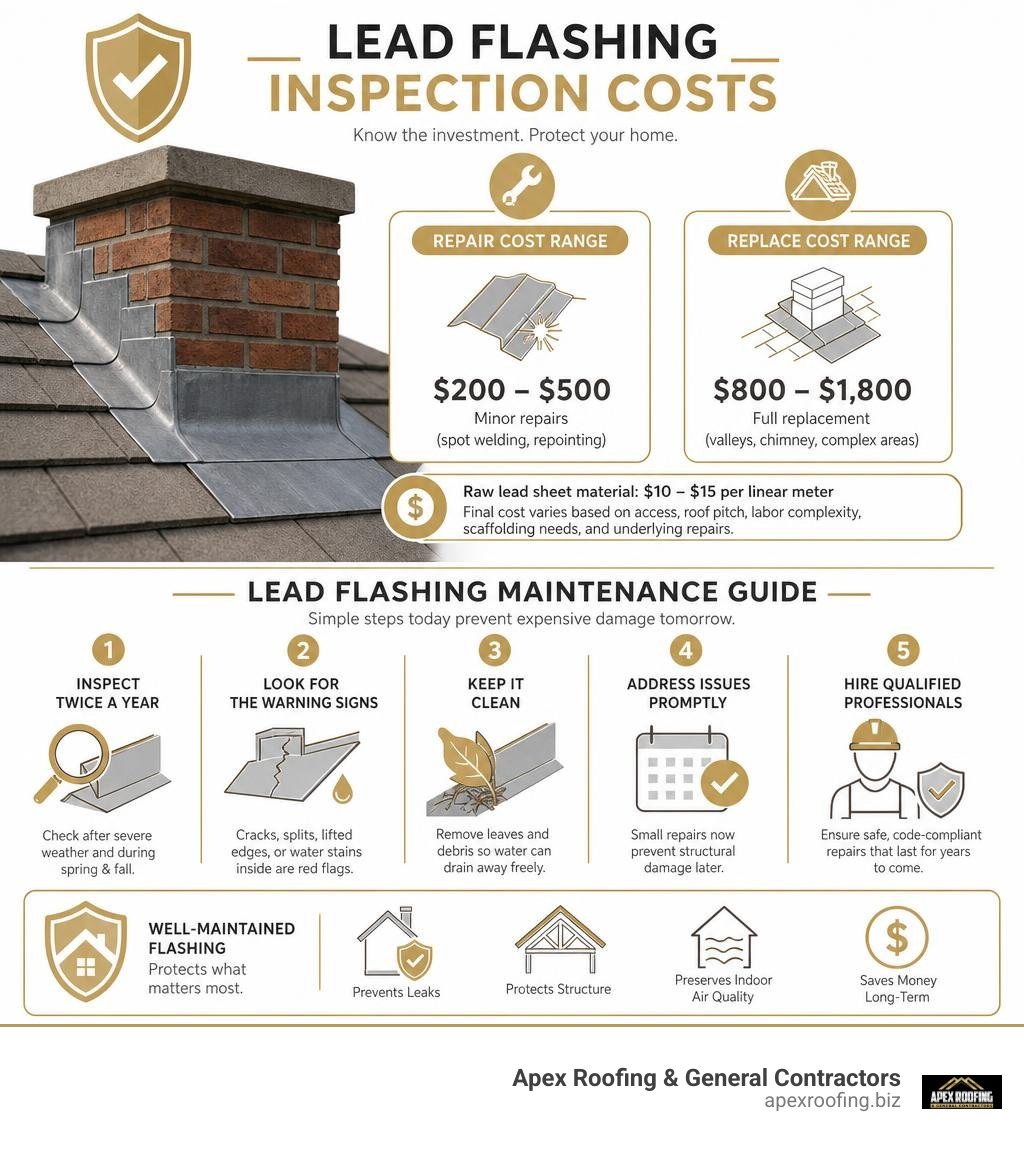
Promptly addressing cracked lead flashing protects your property against structural timber decay, attic insulation damage, and costly interior drywall repairs. Whether the damage comes from seasonal thermal movement, intense San Antonio heat and UV load, high wind events, expansive clay soil shifting, or recent spring hail season damage, identifying leaks early helps your home stay protected through every season.
Apex Roofing & General Contractors provides roofing repair, Texas insurance claim support, inspections, and flashing restoration across San Antonio and surrounding communities, including Boerne, Bulverde, New Braunfels, Alamo Heights, Terrell Hills, Helotes, and Fair Oaks Ranch. Operating locally from 8131 W Hausman Rd Suite 103, San Antonio, TX 78249, the team helps homeowners understand repair options, local code considerations, and severe South Texas weather risks.
If you suspect active roof leaks, visible ceiling stains, or deteriorated roof metal around your chimney or valleys, contact our local San Antonio roofing professionals today at (726) 727-7663 for a free inspection and free estimates.