- Locations
- San Antonio
- Roof Repair
Roof Repair in San Antonio, TX
Summary
Apex Roofing & General Contractors offers licensed roof repair in San Antonio, TX, covering leak repair, storm damage repair, emergency roofing, and flashing repair for homes and businesses, from its office on W Hausman Rd. Most repairs cost $300 to $1,500; small fixes start near $250 and full-slope hail repairs run up to $4,000. Repairs are diagnosed at the root cause and typically completed in a single visit.
Key Takeaways
- Apex Roofing & General Contractors provides San Antonio roof repair for residential and commercial properties across Bexar County.
- Services include roof leak repair, storm damage roof repair, emergency roof repair, asphalt shingle repair, metal roof repair, and flashing and chimney repair.
- Typical San Antonio roof repair costs range from $300 to $1,500, depending on damage extent and materials involved; handyman-scale fixes are priced from $250 on our handyman roof repair page.
- The team diagnoses the root cause of damage rather than applying surface-level patches, so repairs last through future storms.
- Most roof repairs are completed in a single visit.
- The company helps document storm damage for insurance claims and follows manufacturer-approved methods to preserve existing warranties; if more than 25% of the roof is damaged, replacement is usually the better answer.
- Free inspections and itemized estimates are provided before any repair work begins.


Roof Repair

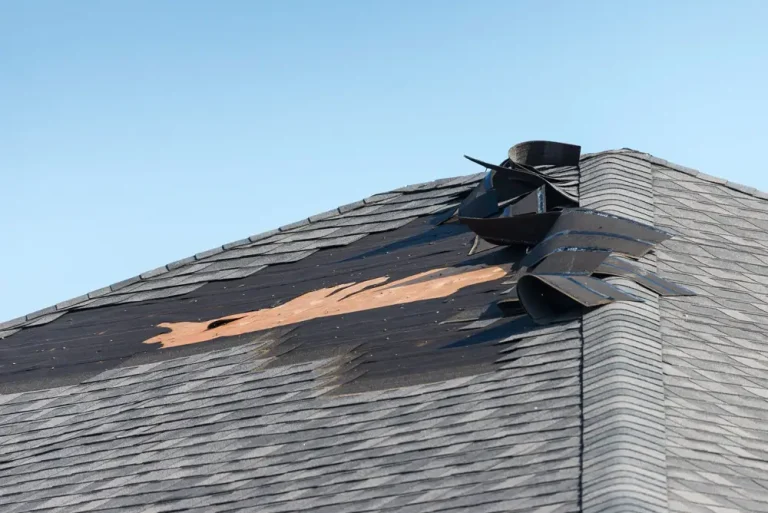
A small roof problem rarely stays small for long. A few missing shingles or a slow drip today can turn into interior water damage, mold, or a much larger repair bill if it’s left unaddressed. Apex Roofing & General Contractors provides fast, reliable roof repair in San Antonio, handling everything from a single damaged shingle to full sections of storm-damaged roofing on both residential and commercial properties.
As a licensed San Antonio roofing contractor, we identify the root cause of the issue rather than just patching the surface, so repairs actually hold up through the next Texas storm. Whether you’re dealing with a persistent leak, wind-lifted shingles, or hail damage, our team inspects the affected area thoroughly and recommends the right fix, without unnecessary upselling toward a full replacement you may not need.
Why San Antonio Roofs Need Repair So Often
San Antonio’s combination of intense summer heat, sudden hailstorms, and strong seasonal winds puts steady stress on roofing materials that many other climates simply do not deal with. Roof surfaces on the Northwest Side and across Bexar County routinely pass 150°F in July and August, so shingles expand and contract with every heat cycle, which speeds up cracking and granule loss well before a roof reaches the end of its expected life. The National Weather Service Austin/San Antonio office issues the county’s severe thunderstorm and hail warnings, and spring is the peak season for the calls we get.
Wind events lift shingle edges and loosen flashing around chimneys and vents, and once a seal is broken, water finds its way in with every rain that follows. The National Roofing Contractors Association notes that most roof failures start small, at a seam, penetration, or edge, rather than across an entire roofing surface, which is exactly why prompt, targeted repair usually works better than waiting for a bigger problem to show up. For the smallest of those jobs – a few shingles, a pipe boot, a loose gutter – see our handyman roof repair page, where most work runs $250 to $1,200.
Roof Repair Services We Provide in San Antonio, TX
Apex Roofing & General Contractors handles every type of roof repair, from minor leaks to widespread storm damage, using the right fix for the specific problem rather than a one-size-fits-all approach.
Roof Leak Repair
Persistent leaks can quietly damage decking, insulation, and ceilings long before they’re visible indoors. We trace leaks back to their source, whether it’s failed flashing, a cracked vent boot, or worn underlayment, and repair the root cause rather than just the symptom.
Left unaddressed, even a small leak can lead to mold growth and costly interior repairs down the line. The Environmental Protection Agency notes that controlling moisture is the key to preventing indoor mold growth, and that water-damaged areas should be dried within 24 to 48 hours to avoid it, which is why prompt leak repair matters as much for air quality as it does for the roof itself.
Storm Damage Roof Repair
San Antonio’s frequent hail and wind events can leave shingles bruised, cracked, or missing across a roof, even when the damage isn’t obvious from the ground. Our San Antonio storm damage roof repair team inspects thoroughly and restores your roof’s protection quickly after severe weather. We document all damage with photos and detailed reports to support your insurance claim if needed.
Emergency Roof Repair
A sudden leak, fallen tree limb, or storm-torn section of roofing can’t wait for a scheduled appointment. Our emergency roofing team responds quickly to stabilize the damage and prevent further loss to your home or property. We prioritize immediate protection first, then return for a permanent repair once conditions allow.
Asphalt Shingle Roof Repair
From curling and cracking shingles to isolated wind or hail damage, we repair asphalt shingle roofs using matching materials so the fix blends in and restores full protection, not just appearance. Our team also checks surrounding shingles for early signs of wear that could turn into future issues.
Metal Roof Repair
Metal roofing is durable, but seams, fasteners, and flashing points can still fail over time or after severe weather. We repair leaks, loose panels, and damaged seams to keep your metal roof performing as it should. Our repairs follow manufacturer specifications to preserve your existing warranty coverage wherever possible.
Flashing and Chimney Repair
Flashing around chimneys, vents, and roof valleys is one of the most common sources of leaks. We repair and reseal flashing to eliminate water intrusion at these vulnerable transition points. This is often a fast, cost-effective fix that prevents much larger repairs down the road.
Handyman Roof Repair
For smaller, non-structural fixes like fascia, soffit, or minor carpentry work tied to your roofline, our handyman roofing repair team handles the details that keep the rest of your roof system in good shape. These smaller repairs are often bundled with a larger roof service for added convenience and savings.
Common Roof Repair Issues We Fix in San Antonio TX
Not every roof problem needs the same fix, and knowing what is actually causing the issue is the first step toward a repair that lasts. Here are the most common issues our crews handle across San Antonio homes.
Issue | What Causes It | How We Fix It |
Missing or torn shingles | Wind, aging materials, or foot traffic during other work | Replace with matching shingles secured to the surrounding roofline |
Leaking flashing | Failed sealant around chimneys, vents, or skylights | Reseal or replace flashing at the affected penetration point |
Soft or sagging decking | Long term water intrusion that has already caused rot | Replace the affected decking before new roofing goes down |
Clogged or damaged gutters | Debris buildup, granule loss, or storm impact | Clean, repair, or replace gutter sections so water drains properly |
Ceiling stains or active leaks | Water tracking from a compromised section of the roof | Locate and seal the source, then repair any affected interior areas |
Punctures or holes in the roof | Falling limbs, storm debris, or animal damage | Patch or replace the damaged section of decking and roofing material |
If you are dealing with something not listed here, our team can still take a look. Most repair issues fall into a familiar pattern once we get eyes on the roof.
Signs You Need Roof Repair in San Antonio
Small roofing issues often show warning signs long before they turn into major damage. Here’s what to watch for before a minor problem becomes a costly one.
- Missing, cracked, or curling shingles anywhere on the roof, even if it looks minor from the ground.
- Water stains on a ceiling or wall, which almost always means water has already made it past the roofing surface.
- Visible daylight in the attic through the roof deck, which calls for prompt attention rather than a scheduled visit.
- Granule buildup in your gutters, a sign that shingles are wearing down faster than expected.
- A recent storm passed through your neighborhood, even if you have not noticed obvious damage yet.
- A previous repair by another contractor is not holding up, which usually means the underlying issue was never fully addressed.
Roof Repair or Replacement in San Antonio, TX: How to Decide
Not every roofing problem calls for the same solution. The table below breaks down the key factors that determine whether repair or full replacement makes sense for your San Antonio roof.
Factor | Repair Usually Makes Sense | Replacement Usually Makes Sense |
Roof age | Under 15 years old | Over 20 years old |
Extent of damage | Localized, under 30% of roof area | Widespread, 30% or more of roof area |
Number of leaks | One isolated leak | Multiple active leaks |
Decking condition | Sound, no rot or soft spots | Rotted, soft, or compromised decking |
Shingle condition | Isolated missing or curling shingles | Widespread curling, cracking, or granule loss |
Repair history | First or infrequent repair | Repeated repairs on the same roof |
Structural signs | None visible | Sagging or visible structural issues |
Storm damage | Confined to one section or slope | Covers most or all of the roof |
Insurance outcome | Adjuster approves a repair | Adjuster approves a full replacement |
Long-term plans | Selling soon, minimal investment needed | Staying long-term, want lasting protection |
A general rule of thumb: if repair costs are approaching 30 to 50 percent of what a full San Antonio roof replacement would cost, replacement is usually the smarter financial move. Since surface appearances can be misleading, especially after hail or wind events, a thorough inspection is the only reliable way to know for sure. Our team can evaluate your roof and give you an honest recommendation, without pushing you toward a replacement you don’t need.
Our Roof Repair Process for San Antonio, TX Properties
Every roof repair follows a clear, step-by-step process to make sure the issue is fixed correctly the first time, not just patched over.
- Free Roof Inspection: Our san antonio roof inspection team evaluates the affected area along with the surrounding roof, decking, and flashing to identify the root cause, not just the visible symptom.
- Diagnosis and Recommendation: We explain exactly what’s causing the issue and provide an honest recommendation, whether that’s a targeted repair or, in more extensive cases, a full roof replacement.
- Transparent Estimate: Before any work begins, we provide a clear, itemized estimate so you know exactly what’s being repaired and what it costs.
- Damage Assessment for Insurance (if applicable): If the damage is storm-related, we document it thoroughly to support your San Antonio roof insurance claim process.
- Repair of the Affected Area: We replace damaged shingles, flashing, or underlayment, and address any exposed decking to fully resolve the underlying issue.
- Leak and Seal Verification: We check surrounding areas for related wear or hidden moisture damage to make sure the repair holds up long-term, not just at the surface.
- Final Cleanup and Walkthrough: We clear debris and stray materials from the work area, then walk you through the completed repair before we consider the job done.
Most roof repairs in San Antonio are completed in a single visit. If your roof has sustained widespread storm damage rather than isolated wear, our team will let you know upfront if a repair is enough or if replacement is the better long-term option.
Why Choose Apex Roofing & General Contractors in San Antonio
- Local Knowledge: Based in San Antonio, we understand how the region’s heat, hail, and storms affect roofs differently than in other climates.
- Licensed and Insured: Fully licensed, bonded, and insured for residential and commercial repair work, giving property owners peace of mind on every job.
- Root Cause Diagnosis: We identify the actual source of a leak or damage rather than applying a quick patch that fails again months later.
- Fast Response Times: From routine repairs to emergency roofing situations, our team responds quickly to prevent small problems from becoming bigger ones.
- Storm and Insurance Experience: Our team documents storm damage thoroughly and supports your insurance claim process from inspection to completion.
- Wide Range of Repair Expertise: From asphalt shingles and metal roofing to flashing, chimneys, and handyman-level fixes, we handle it all under one roof.
- Recognized Craftsmanship: Our work has earned industry recognition and awards for quality and customer satisfaction across San Antonio.
Proudly Serving San Antonio TX and the Surrounding Communities With Professional Roof Repair Services
Apex Roofing & General Contractors provides roof repair for homeowners and businesses throughout San Antonio, Bexar County, and the surrounding Hill Country communities. Whether you’re dealing with an active leak, storm damage after hail or high winds, or a targeted flashing repair at a chimney or vent, our licensed and insured crew diagnoses the true source of the problem, uses manufacturer-compliant materials and methods, and backs every repair with a written workmanship warranty at completion.
We are proud to provide roof repair services in San Antonio, Helotes, Leon Valley, Alamo Heights, Shavano Park, Terrell Hills, Boerne, Bulverde, Fair Oaks Ranch, New Braunfels, Seguin, San Marcos, and neighboring communities. For a full view of our coverage, visit our service area page.
Schedule Your Free Roof Repair Estimate in San Antonio, TX Today
A small leak or a few damaged shingles won’t fix themselves, and waiting usually means more damage and a higher repair bill later. Apex Roofing & General Contractors offers free inspections and honest, itemized estimates so you know exactly what your roof needs before any work begins. Don’t let a minor issue turn into a major one.
Call (726) 727-7663 for a free roof repair estimate, or request online and our team will follow up the same business day.
Our Company Office & Hours
San Antonio, TX
Apex Roofing & General Contractors
8131 W Hausman Rd Ste 103, San Antonio, TX 78249
Monday: 8AM – 8PM
Tuesday: 8AM – 8PM
Wednesday: 8AM – 8PM
Thursday: 8AM – 8PM
Friday: 8AM – 8PM
Saturday: 8AM – 8PM
Sunday: Closed
Read Our Reviews on Google

Frequently Asked Questions
How much does roof repair cost in San Antonio, TX?
Most roof repairs in San Antonio cost $300 to $1,500. Small fixes start around $250 (a pipe boot, a few shingles, a flashing reseal), a single-point leak repair runs $300 to $800, and a full-slope hail repair can reach $4,000. The price depends on the cause, the material, how much area is affected, and whether the decking under it is sound. Storm damage is often covered by homeowner’s insurance. Apex Roofing & General Contractors provides a free, itemized estimate before any work begins; see the full San Antonio repair cost table or get a range in 30 seconds with our roof damage and cost estimator.
Can a roof be repaired instead of replaced?
In many cases, yes. If damage is localized and your roof still has plenty of life left, a targeted repair is usually the smarter and more affordable option. A full replacement only becomes necessary when damage is widespread or the roof is nearing the end of its lifespan.
What causes most roof leaks in San Antonio?
Common causes include damaged or aging flashing around chimneys and vents, cracked or missing shingles from hail and wind, clogged gutters causing water backup, and worn seals around roof penetrations.
How quickly can Apex Roofing & General Contractors repair my roof after storm damage?
We prioritize storm-related and emergency repairs and aim to respond quickly to prevent further damage. Response time can vary based on the severity of local storm activity and current scheduling demand.
Do I need a permit for roof repair in San Antonio?
Most minor roof repairs do not require a permit in San Antonio. Larger repairs that replace a significant portion of the roof or touch structural components can, and a full re-roof always does. Our team checks the current requirements with the City of San Antonio Development Services Department and pulls any required permit on your behalf.
Can you repair a roof that's still under manufacturer warranty?
Yes. We follow manufacturer-approved repair methods and materials whenever possible to help preserve existing warranty coverage on your roof.
How long does a typical roof repair take in San Antonio?
Most roof repairs in San Antonio are completed in a single day, though larger or more complex repairs involving structural decking may take longer.
What is the 25% rule for roofing?
The “25% rule” is a building-code guideline: if more than 25% of a roof’s surface needs work within a 12-month period, many jurisdictions and insurers treat it as a replacement rather than a repair, so that the whole roof is brought up to current code instead of patched in pieces. In practice it is the threshold adjusters and roofers use to decide between a section repair and a full replacement after hail. Under 25% of the roof – one slope, one area of damage – is a repair; over it, the honest recommendation is usually a San Antonio roof replacement, and if the cause was a storm, our Hail Damage Claim Checker shows what insurance is likely to cover.
Can Apex Roofing & General Contractors repair just one section of my roof without touching the rest?
Yes. If damage is limited to a specific section, we repair only that area using materials that match your existing roof as closely as possible.
Do you repair roofs on apartment or commercial buildings, not just single family homes?
Yes, Apex Roofing & General Contractors repairs apartment and multi family properties and other commercial roofs in addition to residential homes.
Testimonials
What they’re saying about us
| 4.8 | ★★★★★ Excellent Based on 219 reviews |
✦ What customers say
Customers most often say Apex Roofing shows up on time, inspects the roof thoroughly and gives an honest answer, including telling homeowners when their roof does not need work. Many reviewers describe help with the insurance claim, drone photos and text updates during the job, and full replacements finished in a single day with the yard cleaned up afterward. San Antonio homeowners also name owner Carlos and inspectors Marshall and Matt for clear communication and follow-up.
AI-generated summary of customer reviews, updated October 9, 2026.

Sep 2026 · Google
APEX Roofing always delivers. They are prompt and on time and have always been courtious and delivered with exceptional quality.…
Read more
…Their quote is what you pay (my experiene) and their prices are very competitive!

Aug 2026 · Google
I was incredibly impressed by the professionalism of the team at Apex Roofing and General Contractors. They made the entire…
Read more
…Residential Roofing experience smooth and stress free from start to finish. Karl Marshall conducted a thorough roof inspection, and then focused on the only repairs really needed (resecuring the soffit all around the roof line where storm pressure had blown it out. I believe others would have been tempted to proclaim full roofing replacement was required. I would highly recommend them to anyone looking for quality work.

Aug 2026 · Google
t Mike and Gavin came out and did a thorough check thru. They notified me that the problem was caused by an unconnected vent…
Read more
…pipe in attic not roof and that they connected it and to call a plumber to just seal it. Then they informed me about the roof that maybe I can get a discount on insurance because the house had premium roofing. Great company great guys didn’t charge anything but will definitely call them if I need roof repairs

Jul 2026 · Google
Gavin and Marshall were very efficient and punctual. They arrived on time, kept me informed throughout the project and completed…
Read more
…the chimney/roof repair with great professionalism and timeliness. Their communication was clear and friendly, making the whole process stress‑free. I highly recommend them for any residential roofing needs and I’m excited to use Apex again for future roof repair work.

Jul 2026 · Google
Had my roof inspected by Karl and Gavin, and I appreciate that they took the time to thoroughly inspect the roof to help find the…
Read more
…cause of our leak. I appreciate them sharing what they were seeing. I’ve had roof issues these past few months and I wish I had gone with APEX from the start as they were much more professional and transparent with the findings.

Jul 2026 · Google
Apex Roofing and General Contractors was incredibly punctual, efficient, and professional. They communicated clearly at every…
Read more
…step and finished the roof repair on schedule and went out of their way to make it perfect. Apex also went above and beyond to be considerate of my time as well as my neighbors when they started and completed the project. I especially appreciated how they showed up exactly on time and kept the work site clean. I highly recommend them for their incredible and reliable residential roofing surfaces.
Show more reviews

Jul 2026 · Google
Apex Roofing and General Contractors showed up right on schedule, explained every step clearly and stayed on task the whole time.…
Read more
…The crew worked efficiently, kept the site tidy and finished our roof replacement ahead of the promised date. Their professionalism and friendly communication made the whole experience stress free. Highly recommend this roofer near me.

Jun 2026 · Google
Marshall from apex roofing took seamlessly stream lined the roof replacement on my house and only took one day. They also beat competitors on cost and quality of roof!

Jun 2026 · Google
Marshall K. was great. Quick responses, helped me through the entire…
Read more
…process. Overall experience with the company was amazing, they did a great job and the roof looks good. It was cool to get drone shots of all the progress in real time.


Jun 2026 · Google
5/5 stars – each star for communication, punctuality, professionalism, efficiency, and timeliness. Gavin & Marshall from Apex…
Read more
…Roofing were great; checked the roof, took pics, showed me full & complete evaluation of the roof's condition & even removed all the leaves collecting on the roof for a year! I very impressed with how punctual & professional they were! I would definitely recommend them for any residential roofing needs.

Jun 2026 · Google
After seeing shingles in our yard, we were nervous about our roof but Apex Roofing & General Contractors made an inspection…
Read more
…process easy & free. Marshall and Gavin’s communication was clear from the first phone call to the final walk‑through. They provided honest feedback and guidance about the status of roof (e.g., the shingles were our neighbor’s and not ours), and answered all our questions. We appreciated their professionalism and straightforward, honest approach to an inspection. I feel confident we will use them again in the future and would recommend them to anyone looking for a reliable roofer nearby.

Jun 2026 · Google
Very professional. Highly recommended

Jun 2026 · Google
5/5 stars – excellent punctuality, efficiency, communication, professionalism and timeliness. Gavin and Marshall from Apex…
Read more
…Roofing arrived on schedule. They did inspection of my roof and advised me of the outcome. Very informative took their time to answer all my concerns.

Jun 2026 · Google
Great on time service for quote, and was very punctual and professional

May 2026 · Google
They always kept me informed and reasonably priced.

May 2026 · Google
So far I like what I see, they started with a thorough roof inspection. Took their time and check from the crawl space to the…
Read more
…roof.
Everything was explained to me so I could comprehend. Very professional !!!!

May 2026 · Google
Working with Michael was a 10/10 experience. He was quick to respond to my request, provided an honest, detailed, and reasonable…
Read more
…quote, and didn't try to upsell us on a full replacement we didn't need. Michael took the time to take pictures and explain what the issue was and provided multiple options. I was very impressed with their professionalism and will definitely use them again for any future roofing needs.

Apr 2026 · Google
Apex Roofing and General Contractors were fantastic. They showed up on time, worked efficiently, and were extremely professional.…
Read more
…Matt and Marshall completed our roof repair quickly and everything was done on schedule. Highly recommend!

Apr 2026 · Google
Great experience checking our roof . Honest people. Didn’t need work thank you for not just taking advantage of my ignorance of…
Read more
…roofing . Marshall I’ll definitely be calling yall back when in need .

Mar 2026 · Google
I loved the communication from Apex Roofing and General Contractors. They called and emailed me with clear updates throughout my…
Read more
…roof repair, answered every question right away, and made sure I knew what was happening at each stage. Their friendly, transparent approach made the whole experience stress free. I’m excited to call them again for any future roof replacement or roof installation.

Feb 2026 · Google
I was extremely impressed with the communication from Apex Roofing and General Contractors. From the first phone call to the…
Read more
…final walkthrough they kept me informed at every step, answering questions promptly and explaining the roof repair process clearly. The crew arrived on time, gave updates throughout the day, and made sure I understood what was happening before moving on. It made the whole project feel seamless and stress free. I would definitely recommend them for any residential roofing work.

Feb 2026 · Google
Very friendly, communicative and punctual.

Jan 2026 · Google
Marshall was great, gave a comprehensive list of products and options. Walked me through the whole process.

Jan 2026 · Google
We needed a roof inspection and called Apex Roofing. Marshall Karl came out and was right on time, even called ahead to let me…
Read more
…know he was on the way. He was super knowledgeable and made everything really easy to understand. I felt guided through the whole process and never confused or stressed. He did an amazing job highly recommend him 110%!
Thank you Marshal Karl

Dec 2025 · Google
Marshall Karl has been one of the greatest inspectors to provide a professional, compassionate, and expedient service in the time…
Read more
…I’ve been a homeowner. This fellow Marine Combat Veteran needs a promotion ASAP. Promote above peers & retain at all costs.

Dec 2025 · Google
Vannesa is very knowledgeable and professional. She helped me with my claim. The whole process was easy and stress free!

Nov 2025 · Google
Had Karl Marshall inspect my roof. Punctual, and professional. I have…
Read more
…experience in construction and I can tell he was very honest with what he was telling me and pricing. @memerios1020