Why Attic Water Damage Is More Dangerous Than It Looks
Attic water damage is one of the most destructive — and most overlooked — problems a homeowner can face. Unlike a burst pipe in the kitchen or a flooded basement, attic leaks often go unnoticed for weeks or months while moisture silently destroys insulation, rots wooden rafters, and creates the perfect conditions for mold.
Here is a quick overview of what you need to know:
| Topic | Key Facts |
|---|---|
| Most common causes | Roof leaks, poor ventilation, ice dams, HVAC condensation, clogged gutters |
| Early warning signs | Water stains, musty odors, sagging insulation, peeling paint, higher energy bills |
| Mold risk window | Mold can begin growing within 24 to 48 hours of moisture exposure (EPA) |
| Typical repair cost | $1,200 to $5,000 depending on damage severity |
| Insurance coverage | Usually covered for sudden, accidental events — not gradual neglect |
| First step | Stop the source, document damage, call a professional |
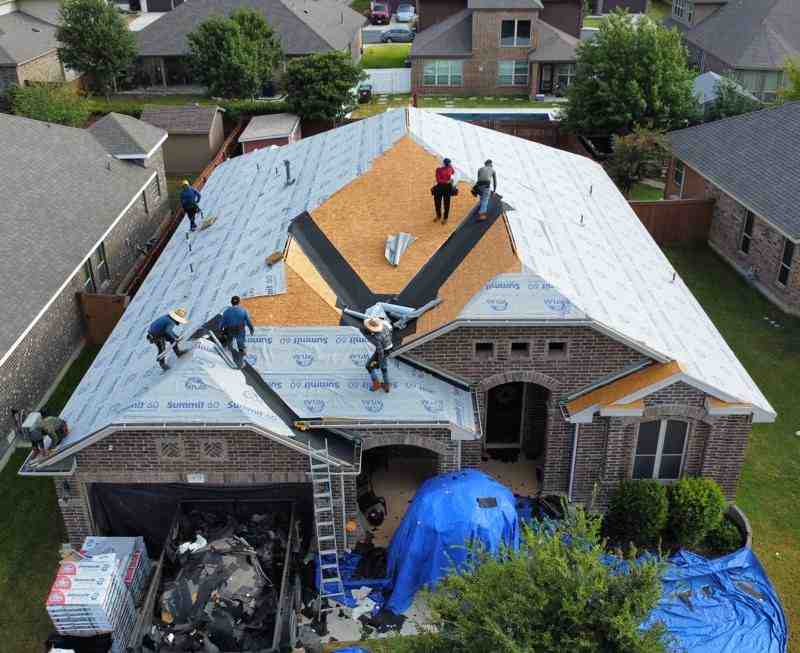
If you already know you have a leak, the most important thing you can do right now is act fast. Every hour of delay increases the risk of mold and structural damage. Start by reaching out to trusted roofing professionals in San Antonio who can assess the full extent of the problem before it gets worse.
This guide walks you through everything — from spotting the earliest warning signs to understanding what a full professional restoration looks like. Whether you are dealing with an active leak or just want to know what to watch for, you will find clear, practical answers here.
I’m Carlos Yzaguirre, President of Apex Roofing & General Contractors, a San Antonio-based roofing firm with hands-on experience diagnosing and repairing the attic water damage that Texas weather routinely causes. Leading hundreds of roof inspections and repairs across South and Central Texas has given me a understanding of how quickly a small attic leak can spiral into a major structural problem.

Glossary for Attic water damage:
Common Causes of Attic Water Damage
Definitive diagnostic data shows that attic water damage rarely stems from a single, isolated issue. Instead, the attic serves as a structural crossroads where your roof system, insulation, ventilation, HVAC equipment, and plumbing lines intersect. When one of these systems fails, gravity ensures that your attic is the first place to pay the price.
Understanding the primary catalysts for moisture accumulation is the first step toward protecting your home:
- Active Roof Leaks: This is the most frequent culprit behind attic moisture. Water breaches the exterior envelope through damaged shingles, cracked flashing around roof penetrations (like chimneys, skylights, and plumbing boots), or compromised valley underlayment.
- Poor Attic Ventilation: In hot and humid climates like San Antonio, proper airflow is critical. If your intake (soffit) and exhaust (ridge or gable) vents are blocked or unbalanced, humid air becomes trapped. When the temperature drops at night, this trapped humidity condenses on the cold underside of the roof deck, mimicking an active roof leak.
- HVAC Condensation: Many Texas homes feature air conditioning air handlers installed directly in the attic. During our scorching summers, these units work overtime. If the primary condensate drain line clogs, or if the drip pan cracks, gallons of water can overflow directly into your ceiling joists and insulation. Furthermore, uninsulated AC ductwork can “sweat” in a hot attic, leading to widespread dripping.
- Plumbing Vent Stacks: Plumbing lines that exhaust sewer gases through the roof rely on rubber boots to seal the penetration. Over time, UV exposure from the intense Texas sun cracks these seals, allowing rainwater to run straight down the exterior of the pipe and into the attic insulation.
- Clogged Gutters and Drainage Overflow: When gutters clog with leaves and twigs, rainwater cannot drain away from the roofline. Instead, it pools at the roof’s edge, backing up under the lower courses of shingles and rotting the wooden fascia boards and soffits.
- Ice Dams (Seasonal Extreme Events): While rare in South Texas, extreme winter weather events can bring freezing temperatures and snow. Ice dams occur when heat escaping from a poorly insulated attic melts snow on the upper portion of the roof. The runoff flows down to the colder eaves, where it refreezes, forming a barrier. Water then backs up behind this ice barrier, forcing its way under shingles and directly into the attic structure.
To explore how these issues impact your home’s structural integrity, read our detailed article on understanding attic water damage risks. If you suspect your roof is the primary culprit behind the moisture, you can learn more about pinpointing the issue by identifying roof leak causes.
Early Warning Signs and Detection Methods

Detecting attic water damage early requires a proactive approach because your attic is largely out of sight and out of mind. Water behaves unpredictably; it rarely drips straight down. Instead, it travels along the slope of rafters, follows electrical conduit, and pools far from the original point of entry.
Homeowners should utilize a multi-sensory approach—combining sight, smell, sound, and touch—to identify problems before they manifest as a ruined ceiling in the living spaces below:
- Sight (Visual Clues): Look for dark water stains, discoloration, or “shadows” on roof sheathing, rafters, and ceiling joists. Examine your attic insulation; wet fiberglass insulation looks matted, compressed, and clumped, while cellulose insulation will appear dark and soggy. Additionally, look for rusting nails, corroded metal connectors, or mineral deposits (efflorescence) on wooden framing.
- Smell (Olfactory Clues): If you open your attic hatch and are greeted by a musty, earthy, or damp odor, moisture is present. Because of “nose blindness,” you may not notice a gradual smell change inside your main living areas, but the transition into the attic space will make it obvious.
- Sound (Auditory Clues): During heavy rainstorms, turn off all appliances and listen closely. You may hear faint dripping, trickling, or the unusual creaking of water-logged wood framing.
- Touch (Tactile Clues): Carefully feel the wooden structures and insulation. Healthy attic wood should feel dry and splintery. If wood feels soft, spongy, or damp to the touch, it has already absorbed significant moisture.
Taking simple preventative measures, such as trimming overhanging tree branches and clearing roof debris, goes a long way toward keeping water out. For a comprehensive checklist on maintaining your roof’s defenses, refer to our homeowner’s guide on preventing roof leaks.
Identifying Hidden Attic Water Damage
Relying solely on the human senses is not always enough, especially when water is trapped behind drywall or deep within blown-in insulation. This is where professional-grade diagnostics become invaluable.
- Thermal Imaging (Infrared Scanning): Saturated building materials retain heat differently than dry materials. By conducting an infrared scan—ideally at dusk when the temperature contrast is highest—restoration professionals can pinpoint exact moisture pathways and hidden pools behind walls and ceilings without tearing anything apart.
- Moisture Meters: These specialized devices measure the electrical conductivity of materials. Because wet wood and drywall conduct electricity better than dry materials, moisture meters provide precise percentage readings of moisture content, allowing technicians to map the exact boundaries of the damage.
- Electronic Leak Detection (ELD): Used primarily on flat or low-slope roofs, ELD tools generate low-voltage electrical pulses across the roof surface to locate breaches in the waterproofing membrane where water has completed an electrical circuit.
If you want to catch these issues before they cause costly interior damage, consider scheduling a residential roof inspection with our certified team.
The Critical Timeline: Mold and Structural Risks
When water enters your attic, the clock starts ticking immediately. The Environmental Protection Agency (EPA) states that mold spores can germinate and begin colonizing wet organic materials within 24 to 48 hours of moisture exposure.
Because attics are dark, warm, and filled with organic food sources (like plywood sheathing, wooden joists, and paper-faced drywall), they represent the ultimate breeding ground for mold. If left unchecked, mold spores will eventually travel through your home’s HVAC ductwork, compromising indoor air quality and triggering respiratory issues, allergies, and asthma.
Simultaneously, moisture begins to degrade the structural integrity of your home. Wood rot (specifically white rot and brown rot fungi) digests the cellulose and lignin that give your rafters and joists their strength. As the wood weakens, the roof deck can sag, shingles can warp, and in severe cases, the ceiling below can collapse under the weight of water-logged drywall and insulation.
To understand how rapidly attic water damage escalates, review the timeline below:
| Timeline | Mold Development | Structural Degradation |
|---|---|---|
| 0 – 24 Hours | Spores absorb moisture; microscopic germination begins. | Insulation begins to absorb water, losing its R-value (thermal resistance). |
| 24 – 48 Hours | Active mold colonies form on drywall paper and wood rafters. | Drywall begins to soften; metal fasteners start to oxidize (rust). |
| 48 – 72 Hours | Mold becomes visible to the naked eye; musty odors intensify. | Wooden framing swells; ceiling plaster cracks; paint begins to bubble. |
| 1 Week + | Deep mold penetration occurs; spores migrate into living spaces. | Wood rot sets in; rafters warp; structural load capacity is compromised. |
To protect your family’s health and maintain your home’s structural stability, prompt action is non-negotiable. You can read more about the biological risks associated with moisture in this guide on attic water damage and mold prevention.
Immediate Steps to Take After Discovering Attic Leaks
If you discover active water intrusion in your attic, taking immediate, organized steps can save you thousands of dollars in secondary damage. Treat the situation as an active household emergency:
- Prioritize Safety First: Never step onto wet drywall or sagging attic floors, as you could fall straight through the ceiling. Avoid touching any wet areas near electrical wiring, light fixtures, or junction boxes. If water is dripping near electrical components, shut off the power to those circuits at your main breaker panel.
- Contain the Water: Place buckets, plastic bins, or heavy-duty tarps directly under active drips to catch falling water. If water is pooling on top of the ceiling drywall below, you can drill a small hole in the center of the wet spot with a screwdriver to drain the trapped water safely into a bucket, preventing a sudden, catastrophic ceiling collapse.
- Control the Source (If Safe): If the leak is caused by a burst plumbing line, shut off your home’s main water valve immediately. If the leak is roof-related and rain is actively falling, do not attempt to climb onto the wet roof yourself; wait for a professional to apply emergency tarping.
- Protect Your Belongings: Move heirlooms, storage boxes, and valuables out of the rooms directly beneath the attic leak. Cover large furniture with plastic sheeting.
- Document Everything: Take clear, well-lit photos and videos of the active leak, the wet attic materials, and any damaged household goods. This documentation is crucial for your homeowners insurance claim.
For more immediate troubleshooting advice, read our quick-response guide on handling emergency roof leaks.
When to Call a Professional for Attic Water Damage
While minor condensation issues might seem like a simple DIY fix, most attic water damage scenarios require professional intervention. You should immediately call a certified restoration and roofing company if you encounter:
- Standing Water: Pooling water requires industrial-grade extraction pumps to remove before it saturates your ceiling joists.
- Structural Sagging: If you notice visible bowing in your roofline, sagging rafters, or a drooping ceiling, the structure is compromised and unsafe to enter.
- Widespread Mold Growth: Remediating mold over an area larger than 10 square feet requires specialized containment protocols, negative air pressure machines, and PPE to prevent spreading toxic spores throughout your home.
- Saturated Insulation: Wet fiberglass and cellulose insulation cannot simply be dried out with household fans. It must be professionally extracted, disposed of, and replaced to prevent ongoing mold growth.
To secure prompt, professional assistance and stabilize your home, learn more about our premier roof leak restoration services.
The Professional Restoration and Repair Process

When our certified team restores an attic after water damage, we follow a strict, multi-step protocol aligned with ANSI/IICRC S500 standards. This scientific approach ensures your home is not just dry on the surface, but completely stabilized and safe for years to come.
- Step 1: Comprehensive Inspection and Assessment: We begin by using infrared cameras and moisture meters to map the exact boundaries of the moisture. We identify the category of water (clean, grey, or black) to determine the appropriate sanitization protocols.
- Step 2: Source Repair and Stabilization: Before drying can begin, the source of the water must be eliminated. This involves repairing broken shingles, replacing damaged flashing, or sealing compromised plumbing boots.
- Step 3: Water Extraction and Material Removal: Any standing water is pumped out. Highly saturated, non-salvageable materials—such as wet drywall and contaminated insulation—are carefully bagged and removed from the attic space to prevent mold spores from escaping.
- Step 4: Structural Drying and Dehumidification: We deploy industrial-grade, high-velocity air movers to circulate dry air across wet wooden framing. Simultaneously, low-grain refrigerant (LGR) dehumidifiers extract moisture from the air, pulling deeply embedded water out of the wooden joists and rafters.
- Step 5: Sanitization and Antimicrobial Treatment: Once the moisture levels in the wood have returned to safe, dry standards (typically below 12% wood moisture equivalent), we apply EPA-registered antimicrobial treatments to eliminate lingering bacteria and prevent future mold growth.
- Step 6: Reconstruction and Insulation Replacement: Finally, we rebuild the affected areas. This includes installing new drywall, painting, and blowing in fresh, energy-efficient insulation to restore your home’s thermal envelope.
To help plan your budget and understand the variables that influence these costs, explore our comprehensive guide on estimating roof leak repair costs.
Homeowners Insurance and Prevention Strategies
A common question among homeowners is whether homeowners insurance will cover the cost of attic water damage repairs. The answer depends heavily on the cause and timeline of the leak.
- Covered (Sudden and Accidental): Insurance policies typically cover water damage that occurs suddenly due to an act of nature or an unexpected failure. For example, if a severe storm tears shingles off your roof, or if a tree limb punctures your roof deck, the resulting attic water damage and structural repairs are generally covered.
- Not Covered (Gradual Neglect): Insurance companies expect homeowners to maintain their properties. If a slow, minor leak has been dripping from an old, worn-out roof for years, the insurer will likely deny the claim, citing a lack of maintenance.
To protect your home and ensure your insurance claims are approved if disaster strikes, implement these proactive prevention strategies:
- Keep Detailed Maintenance Records: Document every roof inspection, gutter cleaning, and minor repair. This proof of active maintenance makes it much harder for insurance adjusters to claim neglect.
- Clean Gutters Regularly: Clean your gutters at least twice a year—more often if you have overhanging trees—to ensure water drains away from your roofline.
- Maintain Proper Attic Ventilation: Ensure your attic intake and exhaust vents are completely clear of insulation and debris. Proper ventilation regulates attic temperatures, preventing condensation and lowering your energy bills.
To learn how to optimize your home’s airflow and prevent condensation-related leaks, read our complete guide to attic ventilation.
Frequently Asked Questions About Attic Leaks
How quickly does mold grow after attic water damage?
Mold spores can begin germinating within 24 to 48 hours after exposure to moisture. Because attics are dark, warm, and contain abundant organic materials like wood and drywall paper, they provide the ideal environment for rapid mold colonization. Prompt drying and humidity control are critical to preventing a widespread mold outbreak.
Is attic water damage covered by homeowners insurance?
Yes, attic water damage is typically covered if it is caused by a sudden, accidental event, such as windstorm damage, hail, or a sudden plumbing burst. However, damage resulting from gradual wear and tear, lack of maintenance, or unresolved slow leaks is generally excluded from coverage.
Can wet attic insulation be dried and reused?
In almost all cases, wet attic insulation must be replaced. Fiberglass insulation loses its fluffiness (loft) and its thermal resistance (R-value) when wet, and it traps moisture against wooden framing. Cellulose insulation, which is made of recycled paper, clumps together and becomes a prime food source for mold. Attempting to dry and reuse wet insulation is highly discouraged.
Conclusion
Attic water damage is a silent threat that can compromise your home’s structural integrity, ruin your indoor air quality, and lead to thousands of dollars in avoidable repairs. Because water travels unpredictably and mold establishes itself within 48 hours, treating every attic leak with urgency is the key to protecting your investment.
At Apex Roofing & General Contractors, we specialize in providing certified, reliable roofing services tailored to the unique climate challenges of San Antonio, Texas. From precision leak detection to complete structural restoration, we prioritize transparent communication and strict compliance with local building codes.
Do not let a small drip turn into a major household disaster. Reach out to our team to schedule a professional roof repair and secure your home’s safety.
Contact us today for a free estimate and to schedule your free inspection. Call our team directly at (726) 727-7663.