A Leaking Roof Valley Can Cost You Thousands — Here’s What to Do
Fixing a leaking roof valley is one of the most urgent repairs a homeowner can face. Roof valleys — the V-shaped channels where two roof slopes meet — carry more water than any other part of your roof. When they fail, water doesn’t just drip. It spreads silently through your decking, insulation, and framing.
Here’s a quick answer if you need to act now:
How to fix a leaking roof valley (quick steps):
- Locate the leak — inspect your attic with a flashlight after rain
- Clear debris from the valley with a stiff-bristle brush
- Apply temporary sealant to visible cracks or gaps (dry conditions only)
- Remove damaged shingles at least 3 feet on each side of the problem area
- Install peel-and-stick waterproof membrane directly on the roof deck
- Lay new metal valley flashing (W-style or open valley) from bottom to top
- Reinstall shingles with proper overlaps, leaving the valley center exposed
- Seal all edges and nail heads with roofing cement
- Test the repair with a garden hose for 15–20 minutes
Important: A temporary patch buys you 6–18 months at most. A $350–$1,000 repair left unaddressed for two or more years can escalate into $12,000–$50,000+ in structural damage.
Statistics show that 80–90% of all roof leaks that originate at flashing details come from roof valleys. That makes them the single most leak-prone area on your entire roof — and one of the most misunderstood. San Antonio homeowners face a unique challenge here. The region’s intense heat, UV exposure, and sudden heavy rainstorms accelerate flashing wear faster than many other U.S. climates.
Whether you’re dealing with a slow drip or a full-blown ceiling stain, understanding the problem is the first step. For expert roof repair solutions that go beyond a quick patch, it helps to know exactly what you’re working with before climbing up on the roof.
I’m Carlos Yzaguirre, President of Apex Roofing & General Contractors, and I’ve spent years helping San Antonio homeowners diagnose and resolve the exact problem of fixing a leaking roof valley — from simple flashing patches to full valley rebuilds after storm damage. In this guide, I’ll walk you through everything you need to know to protect your home the right way.

Know your fixing a leaking roof valley terms:
What is a Roof Valley and Why Does It Leak?
A roof valley is the concave, V-shaped intersection formed where two sloping roof planes meet. Think of it as your roof’s primary drainage highway. When rain falls on either slope, the water naturally converges in this valley, channeling down toward your gutters. Because of this geometry, roof valleys handle a disproportionate volume of runoff, making them highly vulnerable to wear and tear.
To protect this high-flow channel, installers lay down a barrier under the shingles—typically a combination of self-adhering underlayment and a metal liner known as valley flashing. However, because this area is constantly subjected to rushing water, debris, and thermal expansion, it is the source of 80% to 90% of flashing-related roof leaks.
In San Antonio, Texas, the climate places unique stress on these systems. Our intense summer heat causes metal flashing to expand, while rapid cooling during afternoon downpours causes it to contract. Over time, this constant movement can break the seals around fasteners and joints. When you need certified, local expertise to evaluate these climate-specific stresses, reaching out to professional San Antonio roofers is the best way to ensure your home remains protected. To learn more about how climate impacts your roof’s lifespan, read our guide on Why Is My Roof Leaking Causes and Effective Roof Leak Repair Strategies to Protect Your Home?.
Common Causes of Roof Valley Failures
Understanding why a roof valley fails is key to preventing future issues. Here are the primary culprits:
- Improper Fastener Placement: Driving nails too close to the center of the valley is a recipe for disaster. Roofers must keep fasteners at least 6 to 10 inches away from the valley centerline. Nails driven through the center channel create direct pathways for water to seep into the roof deck.
- Unclipped Shingle Corners (Capillary Wicking): This is the single most common installation error. When shingles are laid across a valley, the top corner of each shingle must be cut or “dubbed” at a 45-degree angle. If left unclipped, these sharp corners act as tiny dams, wicking water sideways underneath the shingles via capillary action.
- Debris Buildup and Clogged Valleys: Leaves, twigs, and pine needles love to collect in roof valleys. This debris traps moisture against the shingles and flashing, slowing water flow and forcing runoff to back up under the roofing material.
- Aging Shingles and Flashing Corrosion: Over time, asphalt shingles dry out, shrink, and crack. Similarly, older galvanized steel flashing can rust and develop pinhole leaks after 15 to 20 years of service.
- Lack of Underlayment: A high-quality self-adhering membrane (ice and water shield) must be installed directly on the wood deck beneath the flashing. Skipping this step means that as soon as the outer metal or shingle layer fails, water immediately rots the wood deck.
For a deeper look into general roof vulnerabilities, check out our comprehensive Roof Leak Repair Guide.
How to Identify a Leaking Roof Valley
A roof valley leak can be sneaky. Because water travels along the path of least resistance, a drip inside your home may not align perfectly with the damaged area on your roof. Water often penetrates the valley, runs 10 to 15 feet down a rafter, and finally drips through your ceiling far from the original entry point.
Look for these key indicators to confirm a valley leak:
- Ceiling Stains and Peeling Paint: Brown, water-stained rings on your ceiling or bubbling paint on walls near roof intersections are classic signs of a valley leak.
- Damp Attic Insulation: Go into your attic with a flashlight during or immediately after a heavy rainstorm. Check the insulation directly beneath the roof valleys for dampness or compression.
- Water Streaks on Rafters: Look for dark water staining or white, powdery mineral deposits (efflorescence) along the rafters that run parallel to your roof valleys.
- Dripping Sounds: If you hear water dripping behind your walls or in your attic during a storm, the valley is a primary suspect.
- Conducting a Hose Test: If you cannot find the leak visually, have one person stand in the attic with a flashlight while another gently sprays a garden hose on the roof. Start at the bottom of the valley and slowly work your way up, spending 10 to 15 minutes on each section until the indoor observer spots moisture.
If you suspect a leak but cannot safely pinpoint the source, it is time to search for professional Roof Leak Repair Near Me to get a precise, professional assessment.
Open vs. Closed Roof Valleys: Which is Most Leak-Prone?
When it comes to constructing a roof valley, installers generally choose between three methods: open, closed-cut, and woven. Each system manages water differently, and some are significantly more prone to leaking than others.
+---------------------------------------------------------------------------------+
| VALLEY TYPES |
+---------------------------------------------------------------------------------+
| OPEN VALLEY | CLOSED-CUT VALLEY | WOVEN VALLEY |
| | | |
|   / \ | / \ | / \ |
|  /   |  Exposed  |   \ | / | | \ | / \   / \ |
| / |   Metal   | \   |   /   Cut  | | Shingle  \   |   / \ / \   |
|/ |  Flashing | \  |  /  Edge   | | Overlap   \  |  / Woven   Pattern \  |
+---------------------------+-----------------------------+---------------------------+
| Best water flow; | Clean look; shingles cut | Shingles woven together;  |
| highly leak-resistant. | along center; moderate risk.| high risk of water traps. |
+---------------------------------------------------------------------------------+
- Open Valleys: In an open valley, a metal flashing strip (usually aluminum, copper, or galvanized steel) is installed in the center of the valley. Shingles on both sides are trimmed back, leaving 4 to 6 inches of the metal flashing exposed. This creates a smooth, unobstructed path for water and debris to flow. W-valley flashing, which features a raised V-shaped rib down the center, is particularly effective because it prevents heavy runoff from rushing down one slope and splashing up beneath the shingles on the opposite side.
- Closed-Cut Valleys: Shingles from one side of the roof are run completely across the valley. Shingles from the adjoining slope are then run across, snapped with a chalk line, and cut parallel to the valley center. While this offers a cleaner look, it relies heavily on the quality of the shingles and underlayment to resist water backup.
- Woven Valleys: Shingles from both slopes are woven together across the valley center, creating a continuous asphalt surface. While woven valleys were popular in the past, they are highly prone to failure. As shingles age, they lose flexibility, making them crack and lift where they bend through the center of the valley. This creates pockets that trap debris and water.
| Valley Type | Primary Materials | Est. Lifespan | Leak Risk | Maintenance Needs |
|---|---|---|---|---|
| Open Valley | Metal Flashing (Steel/Copper) & Shingles | 20–30 Years | Low | Low (Debris clears easily) |
| Closed-Cut Valley | Asphalt Shingles & Underlayment | 15–20 Years | Moderate | Medium (Requires regular cleaning) |
| Woven Valley | Asphalt Shingles (Woven) | 10–15 Years | High | High (Shingles crack easily at bend) |
Most experienced roofers agree that open valleys with metal flashing are the most reliable and leak-resistant option. Closed-cut and woven valleys are far more prone to premature failure, especially when subjected to wind-driven rain. For a detailed breakdown of how open valleys perform over time, you can read the How to Repair a Roof Leak in a Valley – DIY Guide – RoofingCalc.com.
Step-by-Step Guide to Fixing a Leaking Roof Valley
Fixing a leaking roof valley permanently requires more than just squeezing a tube of caulk into a crack. Spot fixes are temporary band-aids that often trap water underneath the shingles, accelerating rot. To do the job right, you must expand the repair zone, inspect the underlying structure, and install modern waterproofing materials.

If you are dealing with an active, heavy leak during a storm, read our guide on how to handle an Emergency Roof Leak Fix before attempting a permanent repair.
Essential Tools and Materials for Fixing a Leaking Roof Valley
Before you begin, gather the following tools and materials:
- Safety Equipment: A high-quality safety harness, roof anchors, and non-skid rubber-soled shoes.
- Hand Tools: Hammer, flat pry bar (shingle ripper), utility knife, metal shears, wire brush, and a trowel.
- Underlayment: Self-adhering ice and water protector (peel-and-stick membrane).
- Flashing: W-style or V-style metal valley flashing (preferably aluminum or galvanized steel, 12 to 24 inches wide).
- Fasteners: 1-1/4 inch hot-dipped galvanized roofing nails.
- Sealants: High-grade asphalt roofing cement or compatible polyurethane roof sealant.
Step-by-Step Instructions for Fixing a Leaking Roof Valley
Follow these steps to perform a professional-grade valley repair:
Step 1: Prep and Clear Debris
Set up your ladder safely and secure your safety harness. Use a broom or stiff-bristle brush to sweep all leaves, dirt, and loose granules out of the valley.
Step 2: Remove Damaged Shingles
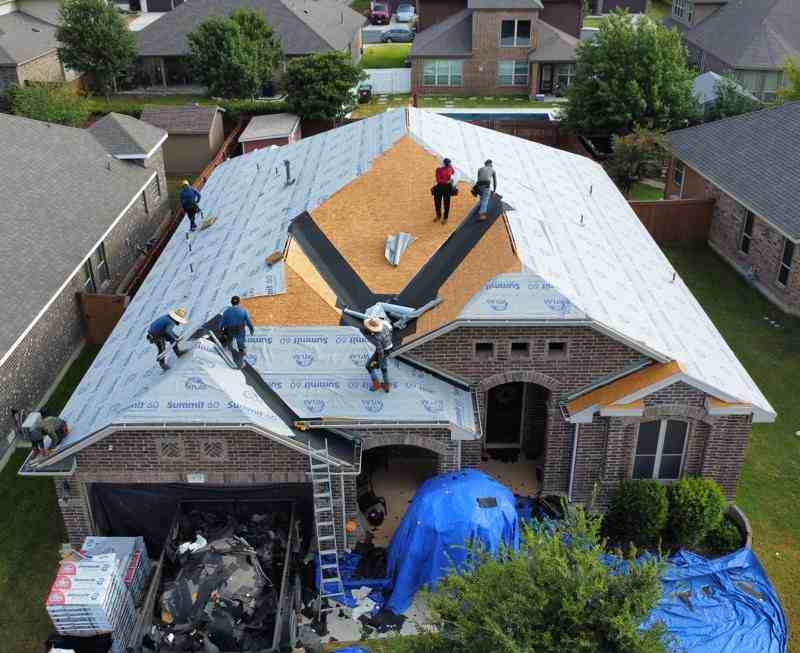
Using a flat pry bar, carefully slide under the shingles bordering the damaged valley area. Gently pry up the nails securing them. You must remove shingles at least 3 feet on either side of the valley centerline to expose the underlying flashing and underlayment. Work from the top of the valley down to the eaves.
Step 3: Inspect the Wood Decking
Inspect the exposed plywood or OSB roof deck for soft spots, rot, or water damage. If the wood is soft or crumbling, you must cut out the damaged section and nail down fresh decking before proceeding.
Step 4: Install Peel-and-Stick Underlayment
Roll out a self-adhering ice and water shield membrane directly over the clean wood deck, centering it down the middle of the valley. This membrane should extend at least 24 to 36 inches up each side of the slope. Press it down firmly to ensure a watertight seal that will self-seal around any future nail punctures.
Step 5: Install the Metal Valley Flashing
Lay your metal valley flashing over the underlayment, starting at the eave (bottom) and working your way up to the ridge. If your valley is longer than 10 feet, overlap the flashing sections by at least 6 inches, applying a generous bead of roofing cement between the overlapping metal joints. Nail the flashing only along the outer edges, spacing nails every 12 inches. Never drive nails through the center of the flashing.
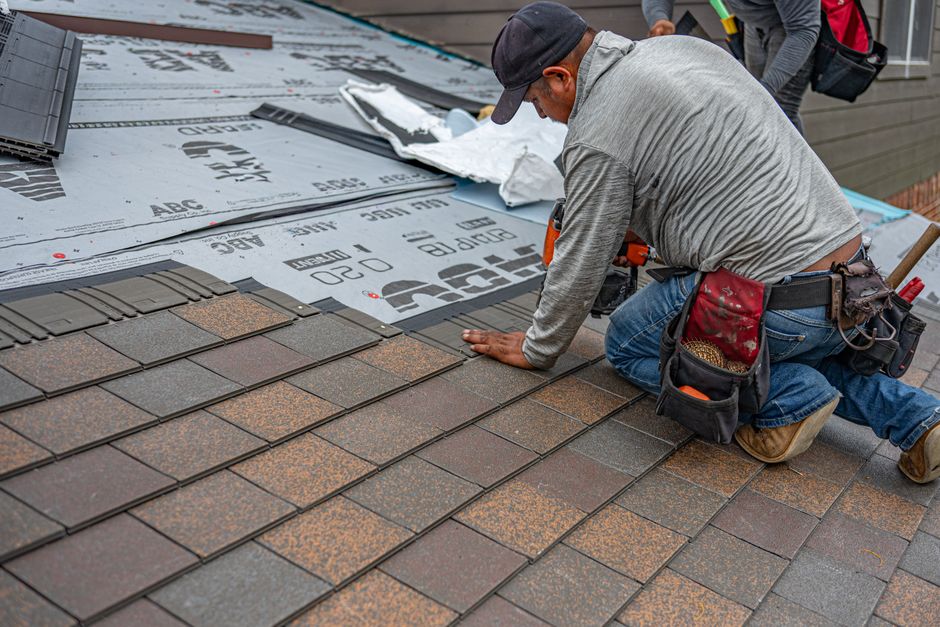
Step 6: Reinstall and Trim Shingles
Lay new shingles starting from the bottom, overlapping the metal flashing edges. For an open valley, snap a chalk line 2 to 3 inches from the center ridge on both sides. Cut the shingles along this line to leave the center of the metal flashing exposed. Remember to cut the top-corner of each valley shingle at a 45-degree angle to prevent capillary wicking.
Step 7: Seal and Secure
Apply a thick bead of roofing cement under the cut edge of the shingles where they meet the metal flashing. This prevents wind-driven rain from blowing sideways under the shingles. Seal any exposed nail heads with a dab of roofing cement.
If this process feels overwhelming, you can explore what a professional handyman-style approach looks like in our guide on Handyman Roof Leak Repair.
Temporary Measures to Manage a Valley Leak
If a storm is actively raging or you are waiting for a professional roofer to arrive, you can take these temporary steps to minimize water damage inside your home:
- Emergency Tarping: Drape a heavy-duty woven plastic tarp over the roof ridge, running it down centered over the leaking valley. Secure the tarp by screwing 2×4 wooden boards over the edges of the tarp into the roof. Never nail a tarp down flat without wood strips, as the nail heads will leak.
- Apply Temporary Sealant: On a dry day, if you spot a clear crack or hole in the flashing, apply a temporary bead of rubberized roof sealant or mortar caulk. This will buy you a few months but will degrade quickly under UV exposure.
- Rolled Roofing Patch: For low-slope valleys where water pools, you can temporarily roll out a strip of mineral-surfaced rolled roofing down the center of the valley, securing the edges with lap cement.
- Contain the Water Indoors: Place buckets under active drips in your attic or living space. If your ceiling is sagging, poke a small hole in the center of the sag with a screwdriver to drain the pooled water safely into a bucket, preventing a sudden, catastrophic ceiling collapse.
For more tips on handling tricky, flat, or low-slope leaks temporarily, read our guide on how to Stop the Drip and Fix Your Leaking Flat Roof.
DIY vs. Professional Roof Valley Repair
While a confident DIYer can handle basic shingle replacement, repairing a roof valley is a highly complex task. Here is why hiring a professional is almost always the smarter choice:
- Extreme Safety Hazards: Roof valleys are steep, concave intersections where foot placement is awkward. Working on a slope higher than a 6:12 pitch without professional fall-protection gear is incredibly dangerous.
- Hidden Structural Rot: What looks like a simple flashing issue on the surface often conceals rotted rafters and moldy decking underneath. Professional roofers know how to structural-inspect the deck and safely replace load-bearing wood.
- Warranty Concerns: Improperly installed valleys can void your shingles’ manufacturer warranty. Professional installations come with both material and workmanship warranties.
- The Cost of Delay: Delaying a proper repair is incredibly expensive. A standard professional valley repair or re-flash typically costs between $700 and $900. If you delay the repair by a year or two, water rot can spread, escalating the repair into a full valley rebuild with structural deck repair costing $1,500 to $3,200+. In extreme cases, neglected valley leaks can cause $12,000 to $50,000+ in structural damage, mold remediation, and interior ceiling replacement.
+-------------------------------------------------------------------------+
| THE COST OF DELAY |
+-------------------------------------------------------------------------+
|  [ Immediate Repair ] |
|  Professional Re-Flash: $700 - $900 |
| |
|  [ Delayed 1-2 Years ] |
|  Full Valley Rebuild & Deck Repair: $1,500 - $3,200+ |
| |
|  [ Neglected Long-Term ] |
|  Structural Damage & Mold Remediation: $12,000 - $50,000+ |
+-------------------------------------------------------------------------+
To understand how professional estimates are calculated, refer to our Roof Leak Repair Estimate Complete Guide and read these essential Roof Leak Repair Estimate Tips.
Frequently Asked Questions about Roof Valley Leaks
How long does a temporary roof valley repair last?
A temporary roof valley repair using roofing cement, caulk, or a tarp typically lasts 6 to 18 months. These materials degrade rapidly under direct sunlight and temperature fluctuations. They should only be used as a short-term stopgap while scheduling a permanent, professional repair.
How can I tell if my roof valley repair is holding?
The easiest way to verify a repair is to perform a controlled garden hose test on a dry day. Spray water directly into the valley for 15 to 20 minutes while someone checks the attic with a flashlight. Additionally, monitor the attic and ceiling closely after the first three major rainstorms following the repair.
Does homeowners insurance cover fixing a leaking roof valley?
Homeowners insurance typically covers repairs if the leak was caused by a sudden, accidental event, such as a fallen tree limb or severe hail damage during a storm. However, insurance will not cover repairs caused by wear and tear, age, or deferred maintenance. Keeping detailed inspection records is crucial when filing a claim.
Conclusion
Fixing a leaking roof valley is not a project you can afford to put off. Because valleys channel the highest volume of water on your roof, even a minor pinhole leak can quickly evolve into rot, mold, and structural failure. Regular maintenance, quarterly debris clearing, and seasonal inspections are your best defense against water damage.
At Apex Roofing & General Contractors, we provide fully certified, code-compliant roofing services tailored to the unique climate demands of San Antonio, Texas. We believe in transparent communication, premium materials, and doing the job right the first time.
Don’t let a small drip turn into an expensive rebuild. If you suspect your roof valley is failing, contact us today at (726) 727-7663 for a free inspection and to receive your free estimate.
- To learn more about our restoration process, visit Find Your Fix Premier Roof Leak Restoration Services.
- Ready to secure your home? Schedule a Professional Roof Repair with our expert team today.