Why Tile Roof Installation Matters for San Antonio Homeowners
A professional tile roof installation is a significant investment that provides your home with best durability, fire resistance, and timeless beauty for 50 to 100+ years. For homeowners in Texas, choosing the right materials and contractor is crucial for a long-lasting result. As San Antonio’s trusted roofing experts, we know that understanding the process helps you make informed decisions. This guide covers everything you need to know.
The tile roof installation process involves these key steps:
- Structural Assessment – Verify your roof can support 900-2,200 lbs per square.
- Deck Preparation – Remove old materials and repair the sheathing.
- Underlayment Installation – Apply a waterproof barrier with proper overlaps.
- Batten System – Install wood strips for drainage and tile support.
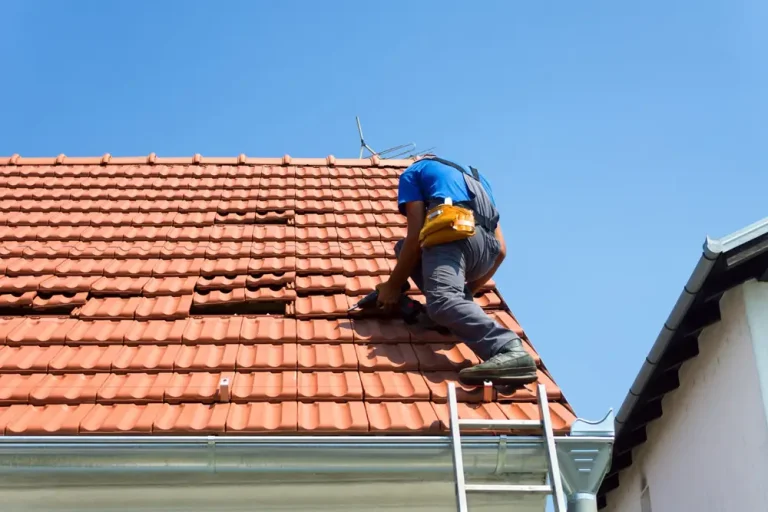
- Tile Application – Lay tiles from bottom to top with correct headlap and fastening.
- Flashing and Finishing – Seal valleys, chimneys, and vents, and install ridge caps.
The average cost ranges from $15 to $30 per square foot including materials and labor. A properly installed tile roof on a 1,500 square foot home may cost between $22,500 and $45,000, but its longevity often makes it more economical than replacing asphalt shingles multiple times.
As Carlos Yzaguirre, President of Apex Roofing & General Contractors, I’ve guided countless San Antonio homeowners through successful tile roof installations. Our team specializes in clay and concrete tile systems designed for Texas weather, ensuring structural integrity and code compliance. Explore our residential roof installation services to learn more.
 Structural assessment with weight capacity check, 2) Deck preparation including sheathing repair, 3) Underlayment application with self-adhered membranes, 4) Batten installation at proper spacing, 5) Tile laying with correct overlap, 6) Flashing installation at penetrations, 7) Ridge cap finishing - tile roof installation infographic")
Quick look at tile roof installation:
- certified roofing professionals
- roof installation San Antonio
- asphalt roof installation cost san antonio
Understanding Tile Roofing: Materials, Costs, and Lifespan

Tile roofing is a premier choice for homeowners seeking durability, aesthetic appeal, and long-term value. The materials and styles available for tile roof installation are diverse, each offering unique benefits.
Types of Roof Tiles: Clay, Concrete, and More
When considering a tile roof installation, the first decision is the material. Each offers distinct advantages in appearance, performance, and cost.
- Clay Tiles: Made from natural earth fired in a kiln, clay tiles offer baked-in color that resists fading. They are renowned for their longevity, fire resistance, and ability to reflect solar heat, a key benefit in San Antonio.
- Pros: Exceptional longevity (100+ years), superior color retention, natural heat reflection.
- Cons: Higher initial cost, heavy, can be brittle if walked on improperly.
- Concrete Tiles: A mix of Portland cement, sand, and water, concrete tiles are a more affordable alternative to clay. They can be molded to simulate various looks, including wood shake or slate, and have a lifespan of 30-50 years.
- Pros: More affordable than clay, versatile appearance, good wind/hail resistance.
- Cons: Shorter lifespan than clay, prone to color fading, heavy.
- Slate Tiles: A premium natural stone, slate is known for unparalleled durability and beauty, with roofs lasting 100 years or more. Its colors vary based on mineral content, offering a unique, sophisticated look.
- Pros: Extremely long lifespan (100+ years), natural appearance, highly durable.
- Cons: Very high cost, extremely heavy, requires specialized installation.
- Composite Tiles: Made from plastics and other sustainable products, these tiles mimic slate, shake, or Spanish tile at a lighter weight, making them a good option where structural load is a concern.
- Pros: Lighter weight, can imitate other materials, often sustainable.
- Cons: May not have the same longevity or authentic look as clay/slate.
Tile profiles range from the classic wavy Spanish S-tile and two-piece Mission style to sleek Flat Shingle tiles for a modern look. Other decorative options include Scalloped tiles, which create a fish-scale pattern, and Interlocking tiles, which are designed for installation efficiency and weather resistance.
Clay vs. Concrete Tiles: A Head-to-Head Comparison
Choosing between clay and concrete is a common dilemma. Both are significant upgrades over asphalt shingles, but key differences influence the decision.
| Feature | Clay Tiles | Concrete Tiles |
|---|---|---|
| Lifespan | 75-100+ years | 30-50 years |
| Cost | Higher ($10,500 – $45,000 for 1,500 sq ft) | Lower ($6,000 – $15,000 for 1,500 sq ft) |
| Weight | Varies, but generally similar to concrete (900-2,200 lbs/square) | Heavy (over 10 lbs per sq ft) |
| Durability | Extremely durable, excellent resistance to fire, hail, and wind. Color is baked in. | Very durable, good resistance to wind/hail. Color is mixed into cement. |
| Color Fade | Excellent color retention; baked-in color is less likely to fade. | Prone to color fading over time as surface pigment wears. |
| Maintenance | Low upkeep, but requires careful handling if walked on. | Low upkeep, but requires careful handling if walked on. |
| Porosity | Less porous due to high-temperature firing, leading to lower moisture absorption. | Can be more porous; sealing is recommended to prevent moisture absorption and deter mold. |
While clay tiles demand a higher initial investment, their superior longevity makes them a timeless choice. Concrete tiles offer a more budget-friendly entry into tile roofing, providing excellent performance for decades.
The Cost of a New Tile Roof
The investment in a new tile roof reflects its premium quality. Generally, tile roof installation costs range from $15 to $30 per square foot, including materials and labor. This is significantly more than asphalt shingles, but the value is in the longevity.
- Material Costs: Typically $5 to $15 per square foot.
- Labor Costs: Specialized labor ranges from $5 to $18 per square foot.
The final price is influenced by the tile material and style, roof complexity (hips, valleys, dormers), underlayment quality, and the cost of removing old roofing or reinforcing the structure.
Lifespan and Durability
The longevity of a tile roof is one of its most compelling attributes. When properly installed, tile roofs are designed to outlast most other roofing materials.
- Expected Lifespan: High-quality clay and slate tile roofs can last 100 years or more, while concrete tiles offer an impressive 30-50 year lifespan. This durability means a tile roof could be the last roof you ever need.
- Class A Fire Rating: Tile roofs are non-combustible, providing excellent protection against fire hazards—a crucial safety benefit.
- Wind Resistance: Properly installed tile roofs can withstand high winds, with some systems rated for speeds up to 200 mph. The Tile Roofing Industry Alliance (TRI) publishes installation manuals with the latest wind uplift criteria, ensuring modern installations meet stringent standards.
For more insights into the longevity of various roofing materials, you can refer to the Estimated Life Expectancy of Roof Systems.
Pre-Installation: Planning and Roof Preparation

Before a single tile is laid, thorough planning and preparation are paramount to ensure the structural integrity and long-term success of your tile roof installation.
Essential Structural and Safety Considerations
The weight of a tile roof is its most significant structural consideration. Concrete and clay tiles can weigh over 10 lbs per square foot, meaning a 1,500 sq ft roof can weigh 8 tons.
- Roof Weight Capacity: It is critical to verify that your roof structure can support this load. We recommend a structural engineer’s consultation, especially when replacing a lighter material like asphalt shingles. Reinforcement may be necessary and will add to the project’s scope and cost.
- Safety Precautions: Tile roof installation is a hazardous job requiring strict safety protocols. Our top priority is safety, including fall protection (harnesses, safety lines) and mitigating crystalline silica dust. Roofing tiles contain silica, which can be harmful if inhaled. We use wet saws for cutting to significantly reduce airborne dust, and our crew always uses appropriate personal protective equipment (PPE).
Tools and Materials Checklist
A successful tile roof installation requires specialized tools and high-quality materials. Key items include:
- Tools: Tape Measure, Chalk Line, Tile Cutter, Wet Saw with Diamond Blade, Drill, Tin Snips, Caulk Gun, and essential safety equipment like harnesses, respirators, and safety glasses.
- Materials: Non-corrosive Roofing Nails or Screws, Heavy-Duty Underlayment (synthetic or self-adhered), Battens (wood or metal), Flashing (copper, galvanized, or aluminum), high-quality Sealants, and specialized tiles for hips, ridges, and starters.
Preparing the Roof Deck for Tile Installation
The roof deck is the foundation of your new tile roof. Proper preparation involves completely removing all old roofing materials down to the structural sheathing. This allows for a thorough inspection of the wood for any rot, water damage, or warping. Any deteriorated sheathing or framing must be replaced to ensure a solid, flat, and stable base for the heavy tile system. Finally, a drip edge is installed along the eaves and rakes to direct water away from the fascia and protect the roof edges.
The Complete Tile Roof Installation Process
With the roof deck prepared, we move on to the precise process of laying the tiles, where expertise ensures every component works in harmony to protect your home.
Step 1: Installing Underlayment and Flashing
The underlayment is the critical waterproof barrier beneath the tiles. Because tiles are a water-shedding system, not a watertight one, this secondary barrier is essential for protecting the roof deck from wind-driven rain or water migration. We use heavy-duty materials like synthetic underlayment or self-adhered membranes, installed in overlapping layers to ensure water drains properly. Flashing is then carefully installed at all roof penetrations—such as valleys, chimneys, and vents—using durable metal to create a watertight seal and prevent leaks.
Step 2: Installing the Batten System
Battens are horizontal strips (typically 1″x2″ wood) installed over the underlayment. They serve several crucial purposes in a tile roof installation: creating a channel for drainage and airflow, and providing a secure anchor point for nailing the tiles. The spacing of battens is critical and depends on the specific tile profile and desired headlap. We chalk lines to ensure accurate, consistent spacing across the entire roof before securely fastening the battens to the deck.
Step 3: A Guide to Proper Tile Roof Installation
Laying the tiles demands precision and patience. The tile roof installation begins at the eave (bottom edge) and moves up toward the ridge. The first course is set at the proper angle using special starter tiles to ensure correct water shedding. Tiles are then laid in successive, overlapping courses. Each tile is secured with corrosion-resistant fasteners, taking care not to drive them too tightly, which could cause cracking. In high-wind areas, metal clips are used for additional uplift resistance. A minimum 3-inch headlap (the amount an upper tile covers the tile below it) is maintained to ensure a weather-tight roof system.
For detailed technical guidance, we refer to industry standards such as the CONCRETE AND CLAY ROOF TILE INSTALLATION MANUAL published by the Tile Roofing Industry Alliance.
Step 4: Cutting, Fitting, and Finishing Touches
The final steps involve meticulous cutting and fitting to create a finished, watertight roof. We use wet saws with diamond blades to precisely cut tiles to fit around chimneys, vents, and skylights. Tiles in valleys are cut at an angle to align with the valley flashing for a neat appearance and proper water runoff. Special cap tiles are installed on hips and ridges, often set in mortar (in non-freeze-thaw climates like San Antonio) or secured with fasteners and sealant to protect these vulnerable areas. Finally, all exposed edges and flashings are sealed to complete the installation.
Post-Installation: Maintenance, Repairs, and Special Conditions
Once your new tile roof is installed, understanding its maintenance needs ensures its longevity. While incredibly durable, tile roofs are not entirely maintenance-free.
Best Practices for High-Wind and Cold-Weather Regions
San Antonio experiences strong winds, so robust installation is key. For high-wind regions, we use improved fastening methods, including special wind clips and adhesives in addition to mechanical fasteners. The underlayment is also critical, acting as the primary water barrier if a tile is dislodged. Proper attic ventilation is equally important in our warm climate to help dissipate heat and moisture. While ice dams are rare in San Antonio, tile systems are adaptable and can include an ice and water shield at the eaves for colder climates.
For reliable roofing services customized to San Antonio’s climate, our team is ready to assist. Find out more about our expertise at roofers near me San Antonio.
Tile Roof Maintenance and Repair
One of the great advantages of a tile roof is its low upkeep. However, periodic attention ensures it reaches its full lifespan.
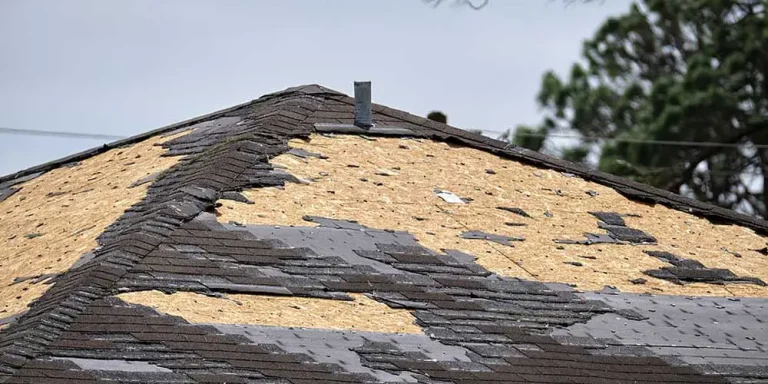
- Routine Maintenance: We recommend a visual inspection annually and after major storms to check for cracked, chipped, or slipping tiles. Keep gutters clear of debris to prevent water backup. In humid areas, moss or algae can be gently cleaned with tile-safe solutions; avoid high-pressure washing, which can cause damage.
- Cracked Tile Repair: Individual cracked or broken tiles from impacts can typically be replaced without disturbing large sections of the roof. The process involves carefully removing the damaged tile, repairing any underlying issues, and securing a new tile in its place. The average cost to repair a tile roof is about $1,000.
- Underlayment Issues: If the underlayment fails before the tiles, it can cause leaks. This is a more extensive repair that involves lifting and reinstalling tiles to replace the membrane underneath.
For more detailed guidance on addressing specific tile damage, refer to our Cracked Tile Repair Ultimate Guide.
Frequently Asked Questions about Tile Roofs
How long does a tile roof last?
A tile roof’s lifespan is a key benefit. Concrete tiles last at least 50 years, while high-quality clay and slate can last 100+ years with proper maintenance, often making it the last roof a home will ever need.
Can you walk on a tile roof?
Walking on a tile roof is not recommended, as it can easily crack the tiles. If absolutely necessary, step only on the supported lower third (headlap) of each tile. Professionals are trained to steer these roofs safely without causing damage.
Is a tile roof more expensive than an asphalt shingle roof?
Yes, a tile roof has a higher initial cost than asphalt shingles, typically ranging from $15 to $30 per square foot installed. However, its extreme longevity (50-100+ years) often makes it more cost-effective over time, as it may never need to be replaced.
Choosing Your San Antonio Tile Roofing Expert
A successful tile roof installation demands expertise, precision, and a deep understanding of local building codes. The process, from structural preparation to the final ridge cap, leaves no room for error. Entrusting your project to a certified professional ensures your investment is protected and your home is safe for decades to come. If you’re considering a tile roof, partner with a contractor who has proven experience.
At Apex Roofing & General Contractors, we pride ourselves on our specialized knowledge in tile roofing. Our team holds certifications in heritage roofing methods and masters traditional hand-cutting techniques alongside modern waterproofing systems. We understand the unique challenges of tile roof installation in the San Antonio climate, ensuring your roof is not only beautiful but also built to last.
For a flawless and compliant tile roof installation in the San Antonio area, contact the experts at Apex Roofing & General Contractors. Call us today at (726) 727-7663 for a free inspection and estimate.