Identifying When Replacing Damaged Shingles is Necessary
Replacing damaged shingles is a critical maintenance task that preserves your home’s structural integrity and prevents minor leaks from escalating into expensive restoration projects. As the leading San Antonio roofing company, Apex Roofing & General Contractors recommends addressing shingle wear immediately to avoid wood rot and mold. Whether you are dealing with storm-induced cracks or age-related curling, understanding the process of replacing damaged shingles ensures your roof remains a reliable defense against the elements.
Here is a quick overview of what replacing damaged shingles involves:
- Identify the damage – Look for cracked, curling, or missing shingles, plus granules collecting in your gutters
- Gather your tools – Flat pry bar, roofing hammer, 2-3 inch roofing nails, roofing cement, and a matching replacement shingle
- Work safely – Use a harness, slip-resistant boots, and never work alone
- Remove the damaged shingle – Break the sealant bond, lift surrounding shingles, and pull the nails
- Install the new shingle – Slide it into place, nail 4-6 times above the tab line, and seal all exposed nail heads
- Re-seal surrounding shingles – Press down tabs with roofing cement to restore wind resistance
For most homeowners, replacing one to three shingles is a manageable DIY project. If damage is widespread, the roof is over 20 years old, or you are not comfortable working at height, it is time to call a San Antonio roofing professional.
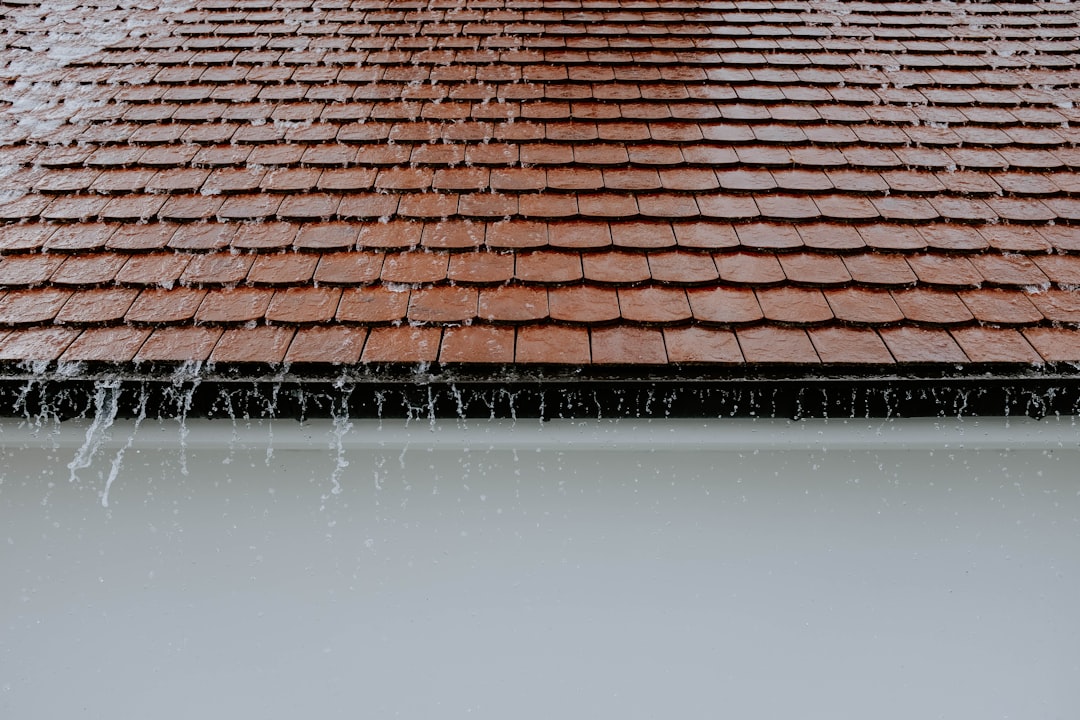
Asphalt shingles cover nearly 70% of U.S. homes, and most last between 15 and 30 years depending on the type and how well they are maintained. Even a well-built roof takes a beating from wind, hail, UV rays, and debris — so knowing how to spot and fix shingle damage early is a skill every homeowner should have.
I’m Carlos Yzaguirre, President of Apex Roofing & General Contractors, and I’ve led our team through hundreds of shingle repair and replacement projects across San Antonio and beyond since co-founding the company in 2022. My hands-on experience with everything from minor storm repairs to full re-roofing gives me a clear view of exactly where DIY ends and where professional help is the smarter call when it comes to replacing damaged shingles — and this guide reflects that.

Replacing damaged shingles word list:

Before you grab your ladder, you need to know exactly what you are looking for. Not all roof issues require a full replacement, but ignoring the subtle signs of wear can lead to a literal “ceiling-collapsing” disaster. In San Antonio, our roofs endure intense UV heat and sudden, violent thunderstorms, both of which accelerate shingle aging.
Common visual cues that you need to begin replacing damaged shingles include:
- Curling Edges: Shingles that turn upward at the corners or “cup” in the middle are no longer shedding water effectively. This is often caused by high heat or poor attic ventilation.
- Horizontal Cracks: If you see cracks running across the width of the shingle, the fiberglass mat inside has likely become brittle and snapped.
- Granule Loss: If your gutters look like they are filled with dark sand, your shingles are losing their UV protection. This “balding” leaves the asphalt vulnerable to the sun.
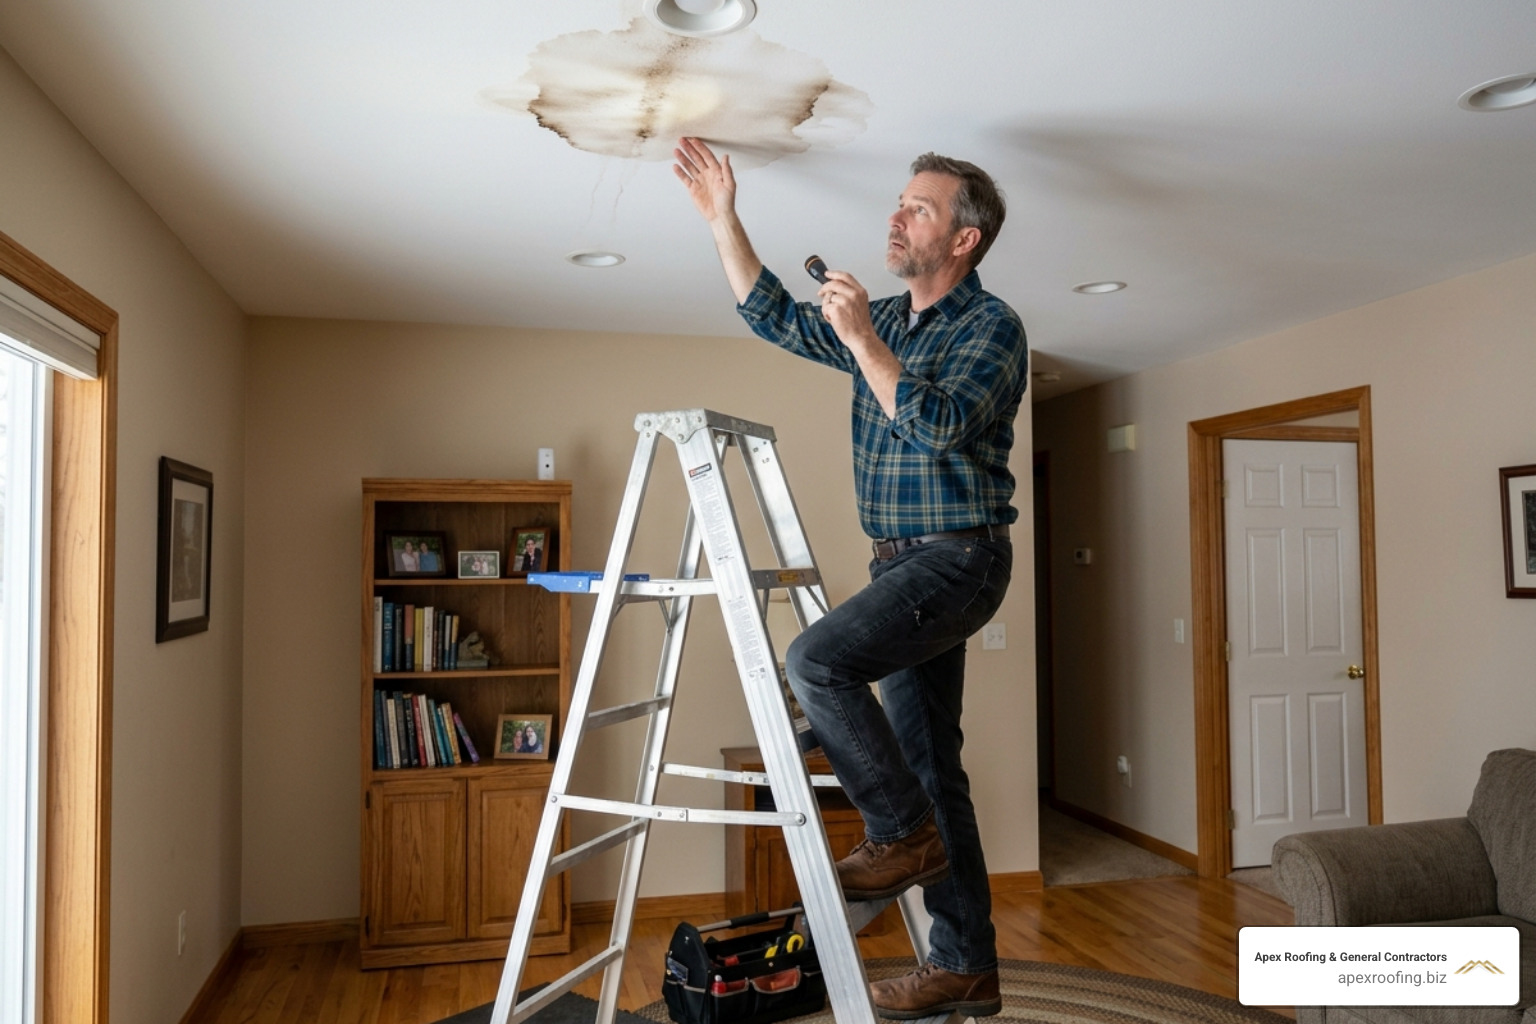
- Water Stains: Check your ceilings and attic. If you see brown rings or mold growth, water is already bypassing your shingles.
If you are unsure about the extent of the wear, our shingle repair ultimate guide offers a deep dive into diagnostic checks. For most localized issues, a simple shingle roof repair is all that stands between you and a dry living room.
Spotting Underlying Decking and Underlayment Damage
Sometimes the problem is deeper than the surface. When you are up on the roof, pay attention to how the surface feels under your feet. Soft, “spongy” spots often indicate that the wooden decking (the plywood beneath the shingles) has rotted.
While inspecting, look for:
- Dark Water Streaks: These are often visible on the rafters inside your attic.
- Mold or Mildew: A musty smell in the attic is a dead giveaway of a long-term leak.
- Underlayment Failure: Traditional felt paper can tear or rot over time. Modern roofs often use synthetic underlayment, which is far more durable but still susceptible to damage if left exposed to the elements for too long.
According to experts at Lowe’s, if the underlayment is damaged, simply slapping a new shingle on top won’t fix the leak. You must ensure the barrier beneath is intact before proceeding with the repair.
Recognizing Latent Storm Damage
In San Antonio, hail is our shingles’ worst enemy. “Latent” damage is the kind you don’t see immediately after the clouds clear. Hail creates small pockmarks that bruise the shingle, loosening the protective granules. Over the next year or two, these bruises turn into holes.
Another hidden issue is loosened self-seal integrity. High winds can lift shingles just enough to break the adhesive bond without blowing the shingle off. Once that seal is broken, the shingle will “flap” in the next breeze, eventually snapping or allowing wind-driven rain to crawl upward underneath the course. If you’ve recently survived a major Texas storm, it’s worth checking for exposed fiberglass mats where the asphalt has been stripped away.
Preparation: Tools, Safety, and Ideal Weather
Preparation is the difference between a successful repair and an afternoon spent in the emergency room. You don’t need a massive workshop to handle replacing damaged shingles, but you do need the right specialized tools.
The Essential Toolkit:
- Flat Pry Bar: Essential for breaking the sealant bond between shingles and prying up nails.
- Roofing Hammer: These have a magnetized face to hold nails and a claw designed for prying.
- Roofing Nails: Use 1-inch to 1.25-inch galvanized nails.
- Roofing Cement: A tube of asphalt plastic roof cement (and a caulking gun) is vital for resealing.
- Utility Knife: For trimming shingles to fit.
If you aren’t ready to invest in these tools, you might consider a handyman shingle repair, but for the determined DIYer, having these on hand is non-negotiable.
Optimal Weather Conditions for Roof Work
Timing is everything. You want a “Goldilocks” day — not too hot, not too cold.
- Ideal Range: 60°F to 80°F.
- Why it matters: In cold weather (below 50°F), asphalt shingles become brittle and can snap like a cracker when you try to lift them. In extreme San Antonio heat (above 95°F), the asphalt becomes soft and “smeary,” and your boots can actually scuff the granules right off the surface.
As noted by This Old House, working on a dry surface is also a safety requirement. Even a little morning dew can turn a shingle roof into a slide.
Essential Safety Precautions for DIYers
We cannot stress this enough: Respect the height.
- The 4:1 Rule: For every 4 feet of height, the base of your ladder should be 1 foot away from the wall.
- Fall Arrest Systems: If your roof is steep (a pitch of 6/12 or higher), you should wear a safety harness anchored to a secure point.
- The Buddy System: Never work on a roof alone. You need someone on the ground to steady the ladder and call for help if things go south.
If you look up at your roof and feel a sense of dread, don’t risk it. It is always better to call roofers near me in San Antonio than to take an unplanned trip off the eaves.
The DIY Process: Step-by-Step Shingle Replacement
Now for the main event. Most people think you just pull off the old shingle and nail a new one down. However, shingles are installed in an overlapping “staircase” pattern, meaning one shingle is actually held down by the nails of the shingles above it.
To master the art of single shingle replacement, you have to work “surgical” style.
Step-by-Step Process for Replacing Damaged Shingles
- Break the Seal: Carefully slide your flat pry bar under the tab of the damaged shingle to break the adhesive bond. You’ll also need to break the seal on the shingles in the row directly above the damaged one.
- Locate and Remove Nails: Lift the tabs of the shingles in the row above. You will see the nails holding the damaged shingle in place. Slide the pry bar under the shingle, right next to the nail, and pop it up. You usually need to remove 4 to 6 nails per shingle.
- Remove the Damaged Shingle: Once all nails are out (including the ones from the row above that pierce the top of your target shingle), the damaged piece should slide right out.
- Slide in the New Shingle: Take your new shingle and slide it into the gap. Make sure it aligns perfectly with the shingles on either side.
- Nail it Down: Drive new nails into the “nailing strip” (the middle line of the shingle). Use 4 nails for standard areas and 6 nails if you are in a high-wind zone or have a steep roof.
Whether you are replacing 3-tab shingles or architectural ones, the mechanics remain the same: align, nail, and seal.
Securing and Sealing for Wind Resistance
Once the nails are in, you aren’t finished. The “self-sealing” strip on shingles requires solar heat to activate. Since you’ve broken the original factory seal, you should give it a helping hand.
Apply a nickel-sized dab of roofing cement under each tab of the new shingle and the shingles you lifted above it. Press them down firmly. This ensures that the next Texas “blue norther” doesn’t catch the edge of your repair and peel it back. Ensure you maintain the standard 5-inch exposure (the part of the shingle visible to the eye) to keep the rows straight and water-tight. For more tips, check out our shingle-savvy DIY guide.
Advanced Considerations for Homeowners
One of the most frustrating parts of replacing damaged shingles isn’t the manual labor—it’s the aesthetics. Asphalt shingles are like denim jeans; they fade over time.
How to Match Replacing Damaged Shingles to Your Existing Roof
If your roof is five years old, a brand-new shingle from the store will look much darker than the rest of your roof. This is due to UV fading and “soot” accumulation.
- The “Spare” Strategy: Check your garage or attic. Many builders leave a leftover bundle of shingles behind. These are the perfect match because they are from the same manufacturing “dye lot.”
- The “Harvest” Method: If you absolutely must have a perfect match for a visible front-facing section of your roof, some pros “harvest” a good shingle from a hidden spot (like behind a chimney or a back corner) and use the brand-new shingle to fill that hidden hole.
- Manufacturer Matching: If you don’t have spares, try to find the manufacturer’s name on the underside of a damaged shingle. Brands like GAF or Owens Corning have specific colors that remain relatively consistent.
For a full breakdown on material types, see our guide on replacing asphalt shingle roofs.
Common Mistakes to Avoid During Repair
We see the same DIY errors over and over again. Avoid these to ensure your repair lasts:
- Nailing into Old Holes: Never reuse a nail hole in the wood decking. It won’t hold. Move the nail an inch to the left or right.
- Face-Nailing: Never drive a nail through the “face” (the exposed part) of a shingle. This creates a direct path for water to enter. Nails must always be covered by the shingle above.
- Improper Staggering: Shingle joints should never line up vertically. They must be offset so water flowing down a joint hits the solid middle of the shingle below it.
- Ignoring the “High Nail”: If you don’t remove the nails from the row above, you’ll tear the new shingle as you try to force it in.
Mistakes here can lead to shingles blowing off in the next storm. If that happens, you’ll need to learn how to repair blown off roof shingles very quickly!
Repair vs. Replacement: When to Call the Experts
How do you know when you are just putting a band-aid on a gunshot wound? Sometimes replacing damaged shingles is a waste of time because the system as a whole has failed.
| Factor | DIY Repair ($200 – $600) | Full Replacement (Varies) |
|---|---|---|
| Roof Age | Under 12-15 years | Over 20 years |
| Extent of Damage | 1-5 shingles in one area | Widespread across multiple slopes |
| Shingle Condition | Flexible, granules intact | Brittle, “balding,” curling |
| Leak Status | Single, localized drip | Multiple leaks or ceiling sagging |
| Granule Loss | Minimal | Gutters filled with “sand” |
Asphalt shingles have a lifespan. Standard 3-tab shingles usually last 15-20 years, while luxury architectural shingles can go for 30 years or more. If your roof is approaching the two-decade mark, the cost to fix roof shingles individually might eventually exceed the cost of a new roof.
When DIY Shingle Replacement is Not Enough
There are structural “red flags” that mean you should put down the hammer and call us:
- Sagging: If the roofline looks wavy or dipped, you have structural rot in the rafters or decking.
- Widespread Granule Loss: If every shingle is losing its grit, the asphalt is exposed to UV rays and will fail rapidly.
- Daylight in the Attic: If you can see the sky from inside your attic, you have more than just a shingle problem.
If you find yourself in this boat, explore our roof shingle replacement complete guide to understand your options.
Frequently Asked Questions about Shingle Repair
Can I replace just one shingle?
Yes! Replacing a single shingle is a standard and effective repair. As long as the surrounding shingles are in good enough condition to be lifted without cracking, you can “surgically” remove one shingle and slide in a new one. This is the best way to handle damage from a fallen branch or a localized impact.
How long can a roof last with a missing shingle?
Technically, your roof might not leak immediately because of the underlayment (the “paper” beneath the shingles). However, underlayment is not designed for direct sun or heavy rain exposure. You should aim to replace a missing shingle within 60 days at the absolute maximum. In the humid San Antonio climate, leaving wood decking exposed for even a few weeks can invite rot and mold.
Should I hire a professional for steep roofs?
Absolutely. If your roof pitch is 6/12 or steeper (meaning it rises 6 inches for every 12 inches of horizontal run), it is too steep to walk on without specialized equipment. Professionals use roof jacks, toe boards, and high-traction gear to ensure the job is done safely. If you aren’t comfortable with heights or don’t have a fall arrest system, the savings of a DIY repair aren’t worth the risk.
Conclusion
Maintaining your roof doesn’t have to be a source of constant anxiety. By staying proactive and replacing damaged shingles as soon as you spot them, you can extend the life of your roof by years. Whether it’s a quick DIY fix after a storm or a weekend project to keep your home’s curb appeal high, the key is attention to detail and a commitment to safety.
Apex Roofing & General Contractors adheres to the highest San Antonio roofing standards, offering certified inspections and reliable residential roof repair services. We pride ourselves on transparent communication and ensuring every repair meets local building codes.
For expert assistance, a free estimate, or a professional damage assessment to see if your roof is ready for the next Texas storm, contact our team today at (726) 727-7663 for a free inspection and free estimates. We are here to help you protect what matters most.