Why a Post-Storm Roof Inspection Can Save You Thousands
A post-storm roof inspection is one of the most cost-effective steps a homeowner can take after severe weather. Your roof is your home’s first line of defense, and catching damage early prevents small issues from turning into structural problems that cost thousands of dollars to fix. For homeowners in Texas, where hail, high winds, and sudden downpours are common, understanding how to safely assess your roof is critical to protecting your investment. If you need fast, expert help after a storm, Apex Roofing & General Contractors offers reliable service and guidance throughout the process.
After major weather events, 85% of serious roof damage is not visible from the ground. Micro-tears in shingles, lifted flashing, punctures from debris, and slow moisture intrusion can all exist without an obvious leak. Left unaddressed, these issues lead to mold growth within 24-48 hours, structural rot within 3-6 months, and repair costs that increase by 300-500% when delayed beyond 90 days.
This guide walks you through safe, step-by-step actions to take after a storm, what to look for inside and outside your home, and how to coordinate with your insurance company. Acting within 72 hours strengthens your claim, since most policies require prompt reporting supported by clear documentation. For homeowners in storm-prone areas like San Antonio, TX, having a clear plan before the next storm hits is one of the best ways to protect your home.

First Steps After the Storm: Safety and Initial Assessment
Your safety is the number one priority. Never climb on a wet or potentially unstable roof. The ideal window for a post-storm roof inspection is within 24–72 hours of the weather event, but only when it is safe to do so. These initial steps help you gauge the situation without putting yourself at risk.
Safety Precautions Before You Begin
Before inspecting for damage, ensure your surroundings are safe. Storms can leave behind hidden hazards.
- Wet Surfaces: Avoid walking on wet patios, decks, or grass, as they can be extremely slippery.
- Downed Power Lines: Assume any downed line is live. Keep a safe distance (at least 35 feet) and report it to your utility company immediately.
- Unstable Structures: Do not approach any part of your home or other structures that appear unstable or are leaning.
- Gas Leaks: If you smell gas, turn off the main gas valve (if safe to do so), open windows, and leave the house. Call your gas company and emergency services from a safe distance.
For more safety advice, GAF offers a helpful guide on what to do after a storm damages your roof. If you suspect significant structural damage, call for professional help immediately.
Immediate Actions to Take
Once the area is safe, begin a preliminary, ground-level assessment.

- Walk the Perimeter: Circle your property and look at the roof from different angles. Note any obvious issues like missing shingles or large debris.
- Look for Fallen Debris: Check your yard for shingles, fascia, or other roofing materials. This indicates the storm’s intensity and potential impact points.
- Check for Immediate Water Intrusion: Inspect ceilings, walls, and your attic for active leaks or new water stains. A small drip can signal a significant breach. For temporary solutions, see our guide on Emergency Roof Leak Fix.
- Take Photos: Document any damage you find, both inside and out, with clear photos and videos. This is critical for insurance claims.
- Emergency Tarping: If you find a large hole or a severely compromised area, emergency tarping may be necessary to prevent further water damage. Many roofing companies, including ours, offer this service.
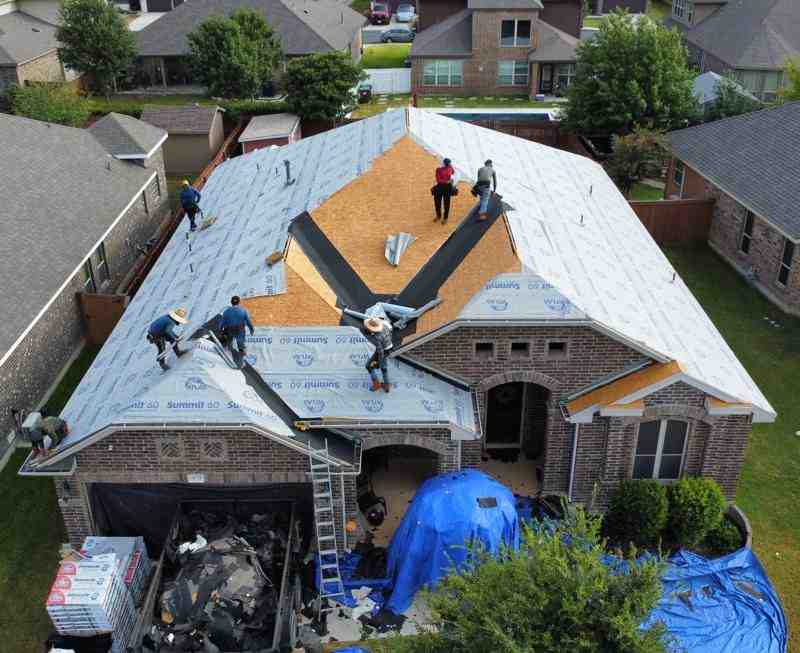
How to Conduct a Safe and Effective Post-Storm Roof Inspection
Once the immediate danger has passed and you’ve completed your initial safety checks, you can begin a more detailed assessment from the ground and inside your home. This process helps identify obvious signs of storm damage and gives you useful information to share with a professional roofing contractor.
Exterior Checklist for Your Post-Storm Roof Inspection
Use binoculars or your phone’s camera zoom to inspect your roof from the safety of the ground. Do not climb onto the roof yourself.

Look for these common signs of storm damage:
- Missing or Curled Shingles: High winds often lift, crease, or tear off shingles, especially along eaves, corners, and ridges.
- Cracked or Broken Tiles: On tile roofs, even a single cracked or broken tile can create a direct entry point for water.
- Granule Loss in Gutters: A buildup of shingle granules (similar to coarse black sand) in your gutters or at downspout outlets indicates accelerated wear from hail or heavy rain.
- Dented Gutters or Flashing: Dents on metal gutters, downspouts, or flashing around chimneys and vents are strong indicators of hail impact on the roof surface.
- Damaged Vents or Skylights: Check roof penetrations for cracks, dents, or displacement that could let water in around the seals.
- Debris on the Roof: Large branches can cause impact damage, while piles of leaves and smaller debris can trap moisture and clog gutters.
- Wind Damage Signs: Look for lifted shingle edges or creases where shingles have been partially unsealed by strong gusts.
- Hail Damage Signs: Hail-related damage often appears as small circular or oval marks, bruises in the shingle mat, or areas where protective granules have been knocked away. For more detail, review our guide on What Does Hail Damage Look Like on a Roof?.
Document anything that looks suspicious with photos from multiple angles.
Interior Checklist: Finding Hidden Water Damage
Sometimes, the first clear evidence of roof damage shows up inside the home. Water can travel far from the point of entry, so be thorough.
- Water Stains on Ceilings: Look for yellow, brown, or discolored patches on ceilings, particularly after heavy rain.
- Discoloration on Walls: Stains or streaks on walls can indicate water running down inside wall cavities.
- Peeling Paint or Wallpaper: Bubbling, peeling, or blistering near ceilings or exterior walls often signals hidden moisture.
- Damp Insulation in the Attic: If it is safe to enter the attic, check for damp, matted, or compressed insulation.
- Musty Odors Indicating Mold: A persistent musty smell in upper levels or the attic frequently points to ongoing moisture problems.
- Sunlight Visible Through the Roof Deck: During daylight, turn off attic lights and look for rays of light penetrating the roof deck—each visible opening is a potential water entry point.
If you notice any of these warning signs, prompt roof leak repair is essential to prevent more extensive damage.
When to Call a Professional and Steer Insurance
While a DIY assessment is a useful first step, a professional inspection is essential for identifying hidden issues and supporting your insurance claim. In Texas, where hail-related losses exceeded $3.5 billion in 2022, a well-documented professional report is often the difference between an underpaid claim and a fully funded repair.
Why a Professional Post-Storm Roof Inspection is Crucial
A professional post-storm roof inspection goes far beyond what a homeowner can see from the ground.
- Hidden Damage Detection: Certified inspectors use specialized tools and training to find subtle damage like micro-tears, lifted seams, and impact bruises that can lead to future leaks.
- Safety Risks of DIY Roof Access: Climbing onto a storm-damaged or wet roof is dangerous and can cause additional damage. Professionals are equipped with safety gear and know how to move without compromising the roof system.
- Detailed Damage Reports: A certified roof inspector in San Antonio provides photo-documented findings, clear explanations, and repair recommendations that are invaluable for insurance adjusters.
- Accurate Repair Estimates: A thorough professional inspection ensures that all damage is identified and priced correctly, reducing the risk of surprise costs later.
- Maintaining Roof Warranty and Insurance Coverage: Many manufacturer warranties and insurance policies expect timely professional inspections after major storms. A formal report helps document that damage is storm-related and occurred within a specific timeframe. Learn more about our professional roof inspections.
Documenting Damage and Filing Your Insurance Claim
Proper documentation is the backbone of a successful roof insurance claim.
- Take Photos and Videos: Capture wide shots for context and close-ups of specific damage, both before and after temporary mitigation.
- Keep Detailed Notes with Dates: Record the date and time of the storm, when you noticed damage, when you contacted your roofer, and all communication with your insurance company.
- Contact Your Insurance Provider Promptly: Report suspected storm damage as soon as possible. Most policies include deadlines for filing claims, and delays can complicate or jeopardize coverage. The Insurance Information Institute emphasizes prompt reporting for hail-related claims.
- Schedule a Joint Inspection with Your Contractor and Adjuster: Whenever possible, have your roofing contractor present when the adjuster visits, so all damage is clearly identified and discussed on-site.
- Understand Your Policy: Review your homeowners policy to confirm what types of storm damage are covered, how deductibles apply, and whether code upgrades are included.
- Avoid Storm Chasers: After large storms, out-of-town contractors often canvass neighborhoods with high-pressure sales tactics. Choose a local, licensed, and well-reviewed company like Apex Roofing & General Contractors instead of signing with unknown operators.
Here is a simplified guide to the insurance claim process:
| Step | Action |
|---|---|
| 1. Emergency Mitigation | Perform a safe, ground-level inspection and take photos. If necessary, get emergency tarping to prevent further water damage. |
| 2. Professional Inspection | Contact a trusted local roofer like Apex Roofing for a thorough inspection and detailed damage report. |
| 3. File Your Claim | Notify your insurance company promptly and provide them with your documentation. |
| 4. Adjuster’s Assessment | Schedule the insurance adjuster’s visit and have your roofer present to ensure all damage is accounted for. |
| 5. Review and Repair | Review the insurance settlement. Once approved, authorize your contractor to begin the repairs. |
For more details on working with your carrier, see our guide to roof insurance claims.
The Risks of Delaying and How to Prevent Future Damage
Ignoring even minor roof damage after a storm can lead to major, avoidable expenses. Addressing problems quickly, and hardening your roof before the next weather event, are two of the most effective ways to protect your home for the long term.
Consequences of Postponing Repairs
Delaying roof repairs can be a costly mistake. Here is what often happens when storm damage is left unresolved:
- Structural Decay: Ongoing water intrusion can rot roof decking and structural framing, weakening the entire system.
- Mold Growth: Damp, enclosed areas such as attics and wall cavities are ideal environments for mold, which can spread quickly and affect indoor air quality.
- Damaged Insulation: Wet insulation loses its R-value, reducing energy efficiency and increasing heating and cooling costs.
- Higher Utility Bills: Compromised roofing and insulation allow conditioned air to escape, forcing HVAC systems to run longer.
- Interior Damage: Water can stain ceilings and walls, warp flooring, and create electrical hazards.
- Denied Insurance Claims: Insurers generally expect homeowners to mitigate damage. Waiting too long to report issues or perform basic repairs can result in reduced or denied claim payments.
To keep problems from escalating, schedule timely residential roof repair in your area whenever damage is suspected.
Proactive Measures: Maintenance and Storm-Resilient Roofing
Preparing your roof before a storm is the best way to minimize potential damage.
- Regular Maintenance: Arrange annual or bi-annual professional roof inspections to catch and correct minor issues before they worsen.
- Keep Gutters Clean: Clear gutters and downspouts allow water to flow away from the roof edge instead of backing up under shingles.
- Trim Overhanging Trees: Removing or thinning branches that hang over the roof reduces the risk of impact damage and debris accumulation.
- Choose Impact-Resistant Materials: When replacing a roof, consider Class 4 impact-resistant shingles, which are engineered to withstand hail and wind better than standard products and can sometimes earn insurance discounts.
- Evaluate Wind Resistance Ratings: In storm-prone regions, select roofing products with wind ratings appropriate for local weather patterns.
- Prioritize Professional Installation: Even the best materials will underperform if they are not installed correctly. Work with a contractor who follows manufacturer specifications and local building codes. For a broader overview of available options, review our Roofing Services San Antonio Guide.
How to Conduct a Safe and Effective Post-Storm Roof Inspection
After ensuring the area is safe, you can perform a more detailed inspection from the ground and inside your home. This helps you gather crucial information before calling a professional.
Exterior Checklist for Your Post-Storm Roof Inspection
Use binoculars or your phone’s camera zoom to inspect your roof from the ground. Never climb onto the roof yourself. Look for these common signs of storm damage:
- Missing, Curled, or Lifted Shingles: High winds can tear off or damage shingles, especially at the roof’s edges and corners. Look for bare spots, creases, or shingles that are no longer sealed down.
- Cracked or Broken Tiles: On tile roofs, check for any cracked or broken pieces that could allow water to penetrate.
- Granule Loss in Gutters: A significant amount of shingle granules (like coarse black sand) in your gutters indicates that your shingles have been damaged by hail or heavy rain, reducing their lifespan.
- Dented Gutters or Flashing: Dents on metal components like gutters, downspouts, and flashing around chimneys are a strong sign of hail impact.
- Damaged Vents or Skylights: Inspect roof penetrations for cracks, dents, or displacement, as these are common entry points for water.
- Debris on the Roof: Large branches can cause impact damage, while smaller debris can clog gutters and trap moisture.
- Hail Damage Signs: Hail can leave small, circular marks or bruises on shingles, cracking them or knocking off protective granules. This damage often isn’t visible from the ground but can lead to future leaks. Learn more about identifying what hail damage looks like on a roof.
Interior Checklist: Finding Hidden Water Damage
Sometimes the first sign of a problem appears inside. Check for:
- Water Stains: Look for yellow or brown discoloration on ceilings and walls.
- Peeling Paint or Wallpaper: Moisture can cause paint or wallpaper to bubble and peel, especially near the ceiling.
- Damp Insulation: If you can safely access your attic, check for damp or compressed insulation, a clear sign of a leak.
- Musty Odors: A persistent musty smell, particularly in upper levels or the attic, often indicates mold growth from hidden moisture.
- Visible Light: In a dark attic, any daylight shining through the roof deck indicates a direct hole.
If you find any of these signs, it’s time to call for a professional roof leak repair to prevent further damage.
When to Call a Professional and Steer Insurance
While a DIY assessment is a great first step, a professional inspection is essential for identifying hidden issues and is a critical part of the insurance process. In Texas, where hail-related losses exceeded $3.5 billion in 2022, a professional report is your best tool for a successful claim.
Why a Professional Post-Storm Roof Inspection is Crucial
A professional post-storm roof inspection goes far beyond what a homeowner can see from the ground.
- Hidden Damage Detection: Professionals use specialized tools and training to find subtle damage like micro-tears, lifted seams, or impact bruises that can lead to future leaks.
- Safety: Climbing a potentially damaged roof is dangerous. Our inspectors are trained and equipped to perform assessments safely.
- Detailed Damage Reports: A certified roof inspector in San Antonio provides comprehensive, photo-documented reports that are invaluable for insurance claims and repair estimates.
- Accurate Estimates: A professional assessment ensures all damage is accounted for, preventing surprise costs and helping you get a fair insurance settlement.
- Warranty & Insurance Compliance: Many warranties require professional inspections. A timely report also provides crucial evidence for your insurance claim. Explore our professional roof inspection services to protect your investment.
Documenting Damage and Filing Your Insurance Claim
Navigating insurance claims can be complex, but thorough documentation is your key to success.
- Take Photos and Videos: Document all visible damage with clear, time-stamped photos and videos.
- Keep Detailed Notes: Log the storm’s date and time, when you found the damage, and every conversation with your roofer and insurance company.
- Contact Your Insurer Promptly: Report the damage to your insurance company as soon as possible. Delays can jeopardize your claim. The Insurance Information Institute highlights the importance of prompt reporting.
- Schedule a Joint Inspection: Have your roofing contractor present when the insurance adjuster inspects your roof. This ensures all damage is identified and properly assessed.
- Understand Your Policy: Review your homeowner’s policy to know your coverage, deductible, and the claims process for storm damage.
- Avoid Storm Chasers: Beware of out-of-town contractors who appear after a storm. Always choose a local, reputable, and licensed company like Apex Roofing & General Contractors.
Here is a simplified guide to the insurance claim process:
| Step | Action |
|---|---|
| 1. Emergency Mitigation | Perform a safe, ground-level inspection and take photos. If necessary, get emergency tarping to prevent further water damage. |
| 2. Professional Inspection | Contact a trusted local roofer like Apex Roofing for a thorough inspection and detailed damage report. |
| 3. File Your Claim | Notify your insurance company promptly and provide them with your documentation. |
| 4. Adjuster’s Assessment | Schedule the insurance adjuster’s visit and have your roofer present to ensure all damage is accounted for. |
| 5. Review and Repair | Review the insurance settlement. Once approved, authorize your contractor to begin the repairs. |
For more details, read our guide on navigating roof insurance claims.
The Risks of Delaying and How to Prevent Future Damage
Ignoring even minor roof damage can lead to severe consequences. A small leak can quickly escalate, compromising your home’s structure. Understanding these risks and taking proactive steps can protect your home and extend the life of your roof.
Consequences of Postponing Repairs
Delaying roof repairs can be a costly mistake. Here’s what can happen:
- Structural Decay: Water intrusion can rot your roof’s decking and support beams, weakening the entire structure.
- Mold Growth: Damp, dark spaces like attics are ideal for mold, which can spread quickly and pose health risks.
- Damaged Insulation: Wet insulation loses its thermal resistance (R-value), leading to higher energy bills.
- Higher Utility Bills: A compromised roof allows air to escape, forcing your HVAC system to work harder and increasing your energy costs.
- Interior Damage: Water can ruin ceilings, walls, and create electrical hazards.
- Denied Insurance Claims: Insurance policies often require homeowners to mitigate damage. Waiting too long to file a claim or make repairs can lead to it being denied.
Don’t let a small problem become a major one. We’re here to help with residential roof repair in San Antonio and the surrounding areas.
Proactive Measures: Maintenance and Storm-Resilient Roofing
Preparing your roof before a storm is the best way to minimize potential damage.
- Regular Maintenance: Schedule annual or bi-annual professional roof inspections to catch and fix minor issues before they worsen.
- Keep Gutters Clean: Clogged gutters cause water to back up under shingles, leading to rot and leaks. Ensure they are clear of debris.
- Trim Overhanging Trees: Remove branches that could fall on your roof during a storm.
- Choose Impact-Resistant Materials: When it’s time for a new roof, consider Class 4 impact-resistant shingles. They offer superior protection against hail and may qualify you for insurance discounts.
- Professional Installation: The best materials are only as good as their installation. Ensure your roofer follows all manufacturer specifications and local building codes for maximum durability.
Our Roofing Services San Antonio Guide offers more insights into comprehensive roof care.
Frequently Asked Questions about Post-Storm Roof Inspections
We hear a lot of questions from homeowners after a storm. Here are some of the most common ones, with clear answers to help you steer the aftermath.
How soon after a storm should I get my roof inspected?
Within 24 to 72 hours. This is the ideal window to have your roof professionally inspected, as long as it is safe. A prompt inspection provides fresh evidence for insurance claims and allows you to address any damage before it worsens. Waiting too long can make it harder to prove the damage was from a specific storm, potentially complicating your claim.
My roof isn’t leaking. Do I still need an inspection?
Yes, absolutely. Many types of storm damage, like hail bruises or lifted shingles, don’t cause immediate leaks but can lead to premature roof failure and water intrusion later. A professional can spot this hidden damage before it becomes a major, costly problem.
Can I perform the inspection myself to save money?
You should only perform an inspection from the ground. Walking on a potentially damaged roof is extremely dangerous. A certified roof inspector has the training and safety equipment to conduct a thorough assessment without risk, and they can identify subtle damage that an untrained eye would likely miss.
Protect Your Home with a Professional Inspection
A post-storm roof inspection is a critical responsibility for homeowners in San Antonio, Helotes, Leon Valley, Alamo Heights, Fair Oaks Ranch, Shavano Park, Terrell Hills, and the greater Bexar County area. By safely assessing your property, documenting what you see, and involving a certified roofing professional, you protect your home’s structural integrity and long-term value.
If you notice any signs of damage—or if a severe storm has passed through your neighborhood—it is wise to schedule a professional inspection rather than waiting for a leak to appear. Timely action helps prevent structural decay, mold, and denied insurance claims due to delayed reporting.
If you have any doubt about your roof’s condition after a storm, contact a trusted expert. The team at Apex Roofing & General Contractors is ready to provide a comprehensive evaluation, clear documentation for your insurer, and honest recommendations for repair or replacement.
Protect your investment today. We offer free estimates. Schedule your free inspection with our certified experts or call us at (726) 727-7663 for prompt assistance.