Why Learning How to Install 3 Tab Asphalt Shingles is Essential for Homeowners
Learning how to install 3 tab asphalt shingles is a skill that can save you thousands of dollars while giving you complete control over one of your home’s most important protective barriers. Whether you’re tackling a small shed or considering a full residential roof, understanding this process empowers you to make informed decisions about your property.
Quick Answer: Essential Steps to Install 3-Tab Asphalt Shingles
- Prepare the roof deck – Remove old shingles, clean surface, repair any damaged sheathing
- Install drip edge along eaves and rakes for water protection
- Apply underlayment – Roll out roofing felt or synthetic underlayment with proper overlap
- Install starter strip – Use reversed shingles or pre-made strips with ¼” to ¾” overhang
- Lay field shingles – Begin at bottom, maintain 5-5/8″ exposure, use 6″ offset pattern
- Nail properly – Place 4 nails per shingle (6 for high-wind areas), just above cutouts
- Install ridge caps – Cut from 3-tab shingles, start opposite prevailing wind
- Flash penetrations – Use step flashing for walls, pipe boots for vents
Three-tab asphalt shingles remain the most affordable roofing option, costing significantly less than architectural shingles while providing 15-20 years of weather protection when properly installed. With a helper or two, you can shingle a 1,500-square-foot roof in about two days, making this a manageable weekend project for experienced DIYers.
However, proper installation requires more than just nailing shingles to your roof. You need the right preparation, tools, and techniques to ensure your new roof will withstand San Antonio’s intense summer heat and heavy rains. Poor installation can void manufacturer warranties and lead to costly leaks and premature failure.
I’m Carlos Yzaguirre, President of Apex Roofing & General Contractors. Since 2022, I’ve seen how understanding how to install 3 tab asphalt shingles correctly makes the difference between a roof that lasts decades and one that fails within years. Whether you plan a DIY project or want to vet your contractor, this guide covers every critical step.

Essential how to install 3 tab asphalt shingles terms:
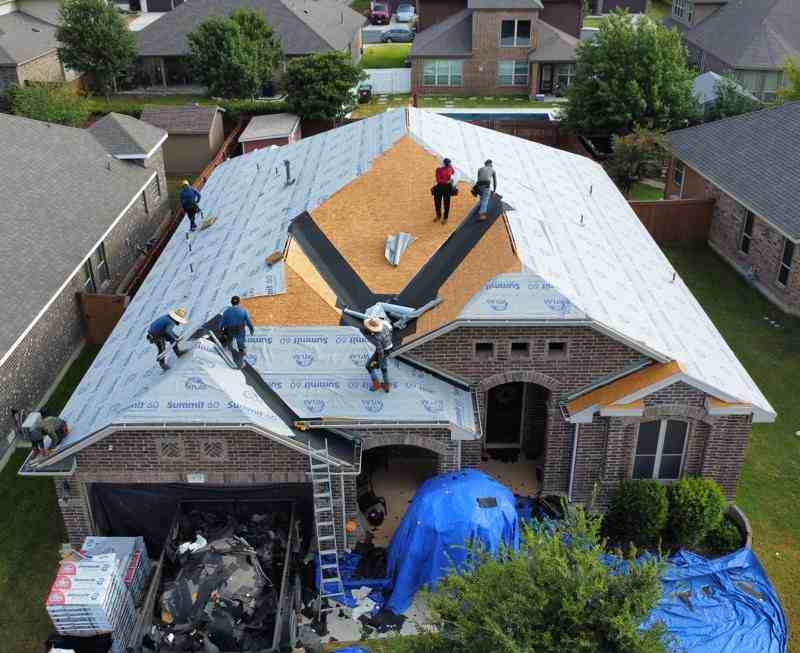
Pre-Installation: Gathering Tools and Preparing the Roof Deck
Before a single shingle is laid, proper preparation is paramount. This phase involves prioritizing safety, gathering the correct tools and materials, and ensuring your roof deck is a clean, solid foundation for the new roof. A well-prepared surface is the first step toward a long-lasting shingle installation.

Roofing safety is non-negotiable. Working at heights with power tools requires prioritizing safety with the right gear and a buddy system. Essential safety equipment includes a fall harness secured to an anchor point, high-grip boots, and a sturdy, well-braced ladder. Always wear gloves and eye protection, keep a first-aid kit accessible, and never work alone on a roof.
Essential Tools and Materials
To successfully install 3-tab asphalt shingles, you’ll need a range of tools and materials:
Tools:
- Roofing hammer or pneumatic nailer: While a pneumatic nail gun makes quick work of fastening shingles, a roofing hatchet is essential for hand-nailing and can be used to trim shingles.
- Utility knife with sharp blades: You’ll go through many blades cutting shingles. Consider a hook blade for easier cutting.
- Chalk line: Indispensable for snapping straight lines for shingle alignment.
- Measuring tape and Speed square: For accurate measurements and cuts.
- Pry bar or tear-off shovel: For removing old roofing materials.
- Tin snips: For cutting metal flashing.
- Caulking gun: For applying roofing cement.
- Magnetic sweeper: Essential for picking up stray nails after the job.
- Ladder: A safe, braced ladder is non-negotiable.
- Roofing brackets: For safety and stability on steep roofs.
- Safety harness: A fall harness with secure anchor points is a must.
Materials:
- 3-tab asphalt shingles: The star of the show!
- Roofing nails: Galvanized, 11- or 12-gauge, with heads at least 3/8″ in diameter. Ensure they are long enough to penetrate at least 3/4″ into the wood deck.
- Underlayment: Roofing felt (15-pound or 30-pound) or synthetic underlayment.
- Drip edge: Metal flashing for the eaves and rakes.
- Ice and water shield (leak barrier): For vulnerable areas like eaves, valleys, and around penetrations.
- Flashing: Step flashing, pipe boots, and apron flashing for penetrations.
- Roofing cement/sealant: Asphalt plastic cement (ASTM D–4586 Type II).
- Starter strips: Pre-made or cut from regular shingles.
- Hip and ridge cap shingles: Factory-made or cut from 3-tab shingles.
Inspecting Shingle Bundles Before Purchase
Before starting, inspect your shingle bundles for damage like dings or dents, which can indicate compromised shingles. Store bundles in a covered, ventilated area away from weather and extreme heat to protect their integrity.
Preparing the Roof Deck
A solid roof deck is a critical foundation. We strongly recommend a full tear-off, removing all old roofing material to the bare wood. Overlaying old shingles is generally not advised as it can interfere with the new shingles’ seal and may void warranties.
- Tear-off: Use a pry bar or tear-off shovel to remove old shingles and underlayment. Protect house sides and windows from falling debris.
- Clean and Repair: Once stripped, thoroughly clean the roof deck. Remove any old nails, sweep away debris, and ensure the surface is smooth. Replace any damaged, rotted, or sagging sheathing boards. Nail down any loose boards or protruding nails. A smooth, dry, and strong roof deck is essential for a flawless installation.
- Attic Ventilation Check: Proper attic ventilation is crucial for shingle longevity. Ensure complete airflow from bottom to top to prevent heat and moisture buildup, which can cause premature shingle failure. Your ventilation should meet or exceed FHA Minimum Property Standards.
Laying the Foundation: Underlayment and Drip Edge
The underlayment system is your roof’s secondary line of defense against water intrusion. Properly installing the drip edge, ice and water shield (if needed), and roofing felt creates a weatherproof barrier that is essential for the longevity of your shingles and the protection of your home.

Installing Drip Edge
Drip edge is a metal flashing installed along the eaves and rake edges of your roof. It directs water off the roof and into the gutters, protecting the fascia and preventing water from getting under the roofing material.
- Eaves First: Install the drip edge along the eaves (horizontal bottom edges) first, underneath the underlayment. This ensures water flows over the drip edge. Fasten it with roofing nails every 12 inches.
- Rakes Next: After applying underlayment, install drip edge along the rake edges (angled side edges). This time, the drip edge goes over the underlayment to block wind-driven rain.
Applying Ice and Water Shield (Leak Barrier)
For improved protection against heavy, wind-driven rain, we recommend installing an ice and water shield. While ice dams are rare in San Antonio, this shield is excellent for preventing leaks in vulnerable areas.
- Placement: Apply the ice and water shield along the eaves, in valleys, and around all penetrations. It should extend from the eave up the roof to a point at least 24 inches inside the home’s exterior wall line. Always consult local building codes for specific requirements.
- Application: Cut the shield into manageable 10- to 20-foot lengths. After letting it relax, align it with a chalk line, overlapping the drip edge by ¼” to ¾”. Apply it smoothly to the deck, removing the backing as you go and using a hand roller to ensure strong adhesion while avoiding wrinkles.
Installing Underlayment (Roofing Felt or Synthetic)
Underlayment provides an additional layer of protection against moisture and helps maintain a Class A fire rating.
- Types: Choose between asphalt-saturated felt (15-lb or 30-lb) or synthetic underlayment. While 15-lb felt is adequate, 30-lb is more durable. Synthetic options are lightweight, tear-resistant, and offer superior performance.
- Application: Begin at the eaves and work up the roof. Overlap horizontal courses by 2 to 4 inches and vertical end laps by at least 4 inches, staggering them by 6 feet. Secure the underlayment with just enough cap nails to hold it flat. The first course of underlayment should overlap any ice and water shield by about 4 inches.
The Complete How-To: Install 3-Tab Asphalt Shingles Step-by-Step
This is where your roof begins to take shape. Following a systematic process for installing the starter course, field shingles, and ridge caps is crucial for both appearance and performance. Adhering to manufacturer specifications ensures your roof will meet its expected lifespan and warranty requirements.
What is a Starter Strip and How Is It Installed?
The starter strip is a critical component that provides a continuous sealant line along the eaves and rake edges, preventing water from getting under the first course of shingles and enhancing wind resistance.
- Purpose: The starter strip seals the first course of shingles, preventing wind uplift and water infiltration. It also creates a clean, straight edge for the first full row.
- Pre-made vs. Cut Shingles: Use pre-made starter strips or create your own by cutting the tabs off 3-tab shingles, leaving the top granular portion with its adhesive strip. For maximum wind resistance, some roofers apply additional tar sealant.
- Adhesive Strip Placement: When using cut shingles, install them with the factory-applied adhesive strip facing up and positioned along the eave edge, ready to seal the first course of regular shingles.
- Overhang Measurement: The starter strip should overhang the drip edge by ¼” to ¾”. This slight overhang ensures water drips clear of the fascia board.
- Nailing Pattern for Starter Course: Fasten the starter strip with 4 nails, placed 1.5″ to 3″ up from the eave edge. Place nails along the top edge so the subsequent shingle course will cover the nail heads.
To learn more about the importance and installation of starter strips, we recommend checking out resources like this one on GAF starter strip shingles.
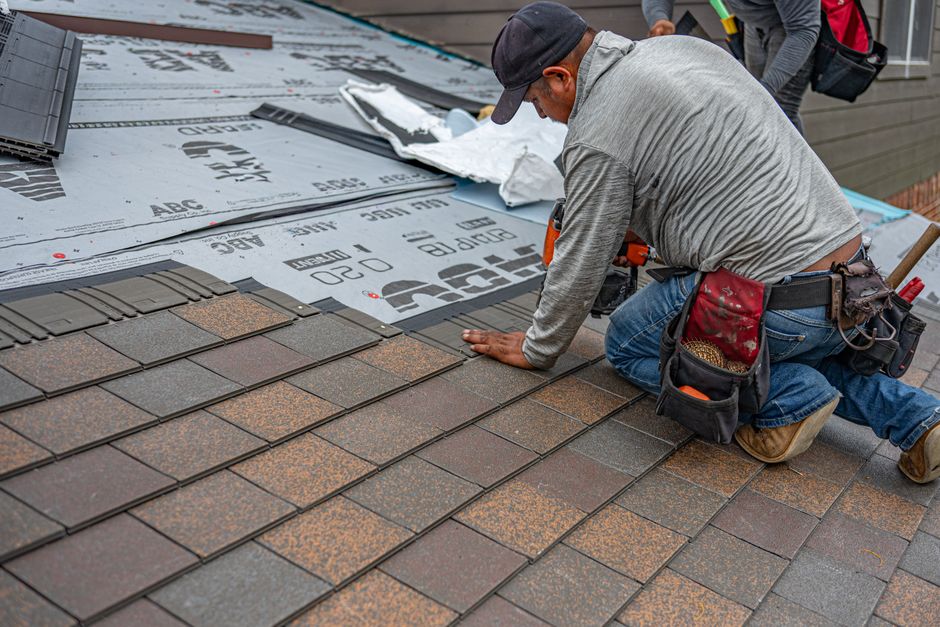
Correct Nailing and Alignment for How to Install 3-Tab Shingles
Achieving a professional-looking and weather-tight roof depends heavily on consistent shingle layout and proper nailing techniques.
- Shingle Layout Methods: Consistent exposure and offset are key for a watertight 3-tab shingle roof. The standard exposure is 5 5/8 inches. The offset between courses should also be 5 5/8 inches (4-inch minimum) to stagger the cutouts and prevent water intrusion.
- Snapping Horizontal and Vertical Chalk Lines: To ensure straight courses, snap a horizontal chalk line for your first full course (typically 7 inches from the eave). From there, snap lines for each subsequent course based on the 5 5/8-inch exposure. Vertical lines can also be used to maintain the offset pattern.
- The 6-inch Offset Pattern: The standard method for staggering shingles is the 6-inch offset pattern. This involves trimming 6 inches off the first shingle of the second course, 12 inches off the first shingle of the third course, and so on, creating a diagonal pattern that prevents cutout alignment.
- Nailing Pattern and Technique:
- Standard Slopes (4:12 to 21:12): Use 4 nails per shingle. Place them about 1 inch from each end and 5/8″ above the cutout slots, ensuring they are just below the self-sealing strip. Never nail into or above the adhesive.
- Steep Slopes (>21:12) and High-Wind Areas: Use 6 nails per shingle for added resistance against gravity and wind. On slopes over 60 degrees, also apply two spots of asphalt plastic cement under each tab.
- Driving Nails Flush: All fasteners must be driven flush with the shingle surface. Overdriven nails cut the shingle, while underdriven nails prevent the next course from sealing. Nails must penetrate at least 3/4″ into the wood deck. Calibrate pneumatic nailers properly.
If you’re considering replacing existing 3-tab shingles, the preparation and initial steps are similar. Learn more about the process on our replacing 3 tab shingles guide.
Installing Hip and Ridge Cap Shingles
Hip and ridge cap shingles provide a finished look and crucial protection along the highest points of your roof where two planes meet.
- Creating Ridge Caps from 3-Tab Shingles: You can cut full 3-tab shingles into three individual 12″ x 12″ cap pieces. Trimming the top corners gives them a more finished look.
- Pre-formed Hip and Ridge Shingles: For a more robust and uniform finish, use pre-formed hip and ridge shingles designed specifically for this application.
- Starting Opposite Prevailing Wind: Begin installing ridge caps on the end of the ridge opposite the prevailing wind direction to prevent wind from lifting them.
- 5-inch Exposure: Overlap each cap shingle to achieve a 5-inch exposure, bending it evenly over the ridge or hip.
- Using Longer Roofing Nails: Use longer nails (typically 1 ¾”) to penetrate all shingle layers and at least 3/4″ into the roof deck. Drive one nail on each side, about 1 inch from the edge and just below the self-sealing strip.
- Sealing the Final Nail Head: The last cap shingle will have exposed nail heads. Cover them with a dab of asphalt plastic cement to create a watertight seal.
Handling Complex Areas and Special Conditions
Nearly every roof has features that require special attention, such as valleys, vents, and chimneys. Learning how to properly shingle and flash these areas is what separates an amateur job from a professional one. Different roof slopes also demand specific installation techniques.
Shingling in Valleys
Valleys are critical areas where two roof planes meet, channeling a significant amount of water. Proper installation here is paramount to prevent leaks. We generally recommend two main methods:
| Feature/Method | Open Valley | Closed-Cut Valley |
|---|---|---|
| Description | Uses a metal liner exposed to the weather, with shingles trimmed back from the center. | Shingles from one side extend across the valley, and shingles from the other side are cut along a chalk line near the valley center. |
| Underlayment | 36″ wide strip of ice and water shield centered in the valley. | 36″ wide strip of ice and water shield centered in the valley. |
| Metal Liner | Required (minimum 24″ wide, 26-gauge metal). Fasten edges, overlap sections by at least 6″ and seal. | Not typically used, but can be underlying. |
| Shingle Placement | Trim shingles to fit chalk lines (minimum 2″ from center). Clip top corners at 45 degrees. | Shingles from one side extend at least 12″ across the valley. Shingles from the other side are cut 2″ back from the valley centerline, creating a “cut” appearance. |
| Fasteners | At least 6 inches away from the valley center. | At least 6 inches away from the valley center. |
| Sealing | Apply roofing cement under shingle ends, especially clipped corners. | Embed cut valley shingles in a continuous 3″ wide bead of asphalt roof cement along the cut edge. |
| Appearance | Distinct metal channel. | Shingles cover the entire valley, giving a more uniform appearance. |
| Complexity | Can be simpler for DIY, but requires precise metalwork. | Requires careful cutting and sealing of shingles. |
Installing Flashing Around Penetrations
Any object penetrating the roof, like vents, pipes, or chimneys, creates a potential leak point if not properly flashed.
- Pipe Boots for Vents: For vent pipes, shingle up to the penetration, then place a pipe boot over the pipe. The boot’s base should rest on the downslope shingles. Cut the upslope shingles to fit snugly around the boot, overlapping its flange. Use roofing cement instead of nails to secure any shingle portions that lie on top of the flashing to prevent punctures.
- Step Flashing for Chimneys and Walls: Where a roof meets a vertical wall or chimney, step flashing is essential. These L-shaped metal pieces (typically 8″ x 8″) are woven into each shingle course to block water.
- Application: Lay a shingle, then place a piece of step flashing over it, bending half flat on the roof and half up the wall. Nail the flashing only to the roof deck, not the wall. The next shingle course then covers the horizontal flange of the flashing.
- Chimneys: For chimneys, step flashing is combined with apron flashing (at the base) and counter-flashing (cut into the chimney’s mortar joints) to create a fully integrated, watertight seal. Always apply a self-adhering membrane to the deck around the chimney before flashing.
Installation on Low-Slope Roofs
Roofs with a low slope (2:12 to less than 4:12) are more susceptible to water penetration because water drains more slowly.
- Double Underlayment: On low slopes, apply a 19-inch starter strip of underlayment at the eaves. Then, overlap full 36-inch courses by 19 inches. This method creates a double layer of underlayment for superior water resistance.
- Additional Sealant: Some manufacturers require hand-sealing shingles with asphalt cement in low-slope applications.
Installation on Steep-Slope Roofs
Steep-slope roofs (greater than 21:12 or 60 degrees) require extra precautions due to gravity and increased wind exposure.
- More Fasteners: For steep slopes, always use six fasteners per shingle instead of the standard four.
- Asphalt Plastic Cement: In addition to extra fasteners, apply two spots of asphalt plastic cement (about 1″ in diameter) under each shingle tab to secure them against gravity.
- Safety Equipment: Working on steep roofs absolutely necessitates the use of roofing brackets and a safety harness.
For a deeper dive into manufacturer-specific instructions, which we always recommend consulting, you can view detailed installation instructions like the Malarkey 3-Tab Shingles Installation Instructions.
Common Mistakes and Knowing When to Call a Professional
A DIY roofing project can be rewarding, but it’s also fraught with potential pitfalls. Understanding common mistakes—like improper nailing or poor flashing—can save you from costly future repairs. It’s also important to recognize when a project is beyond your scope and it’s time to call a certified roofer.
Common Mistakes to Avoid
Even experienced DIYers can make errors that compromise a roof’s integrity. Here are some common pitfalls we’ve seen:
- Improper Nail Placement: Incorrect nailing—too high, low, crooked, overdriven, or underdriven—is a top cause of leaks, blow-offs, and voided warranties. Nails must be flush and penetrate the deck correctly.
- Misaligned Courses: Not using chalk lines for consistent exposure and offset results in a poor look and creates water channels. Proper staggering is essential to prevent leaks.
- Forgetting Starter Strips: Skipping the starter strip leaves the eaves and rakes vulnerable to wind uplift and water penetration, undermining the entire roof system.
- Inadequate Flashing: Poorly installed or missing flashing around penetrations (vents, chimneys) and at walls is a primary cause of roof leaks. Flashing must be integrated with the shingles and properly sealed.
- Ignoring Manufacturer Specifications: Deviating from the shingle manufacturer’s installation instructions can void your warranty and lead to premature roof failure.
- Inadequate Ventilation: Neglecting attic ventilation allows heat and moisture buildup, which can cause shingles to blister, crack, and curl prematurely.
- Working in Poor Weather: Avoid installing shingles in extreme temperatures. Cold makes them brittle, while heat makes them soft and easy to damage. Never work in wet or high-wind conditions.
When to Hire a Professional
While installing 3-tab asphalt shingles can be a DIY project, there are definite situations where calling in the experts is the smartest decision.
- Steep or Complex Roofs: Roofs with a steep pitch, multiple valleys, or complex angles are more dangerous and technically challenging. Professionals have the right equipment and experience to handle these jobs safely.
- Extensive Deck Damage: If your roof deck has widespread rot, sagging, or structural issues, it requires specialized repair that goes beyond simply replacing shingles.
- Lack of Safety Equipment: If you don’t have access to proper fall protection, sturdy ladders, and other safety gear, the risk of serious injury is too high.
- Warranty Concerns: Many manufacturers offer extended warranties only when their products are installed by certified professionals. A DIY installation can void these valuable warranties.
- Time and Expertise: If you lack the time, physical ability, or confidence in your skills, a professional team can complete the job quickly and correctly, often in just a couple of days.
- Local Building Codes: Professional roofers are familiar with local building codes and permitting requirements in San Antonio, ensuring your installation is compliant.
There’s no shame in calling in a pro if you’re nervous about heights or don’t feel fully ready. For certified, reliable roofing services in San Antonio, we encourage you to find a certified roofing contractor in San Antonio.
Your Flawless Roof Awaits
Installing 3-tab asphalt shingles is a significant undertaking, but with careful planning and attention to detail, it is an achievable DIY project. By following these steps, you can ensure your new roof is not only beautiful but also provides robust protection against the elements. If you encounter extensive damage or feel the project is too complex, don’t hesitate to seek professional help. The certified team at Apex Roofing & General Contractors is ready to provide expert guidance and installation. For a free estimate on a durable and professionally installed roof, call (726) 727-7663 for your free inspection.